Essential Safety Protocols for Microwave Chemical Reactions: A Comprehensive Guide for Researchers
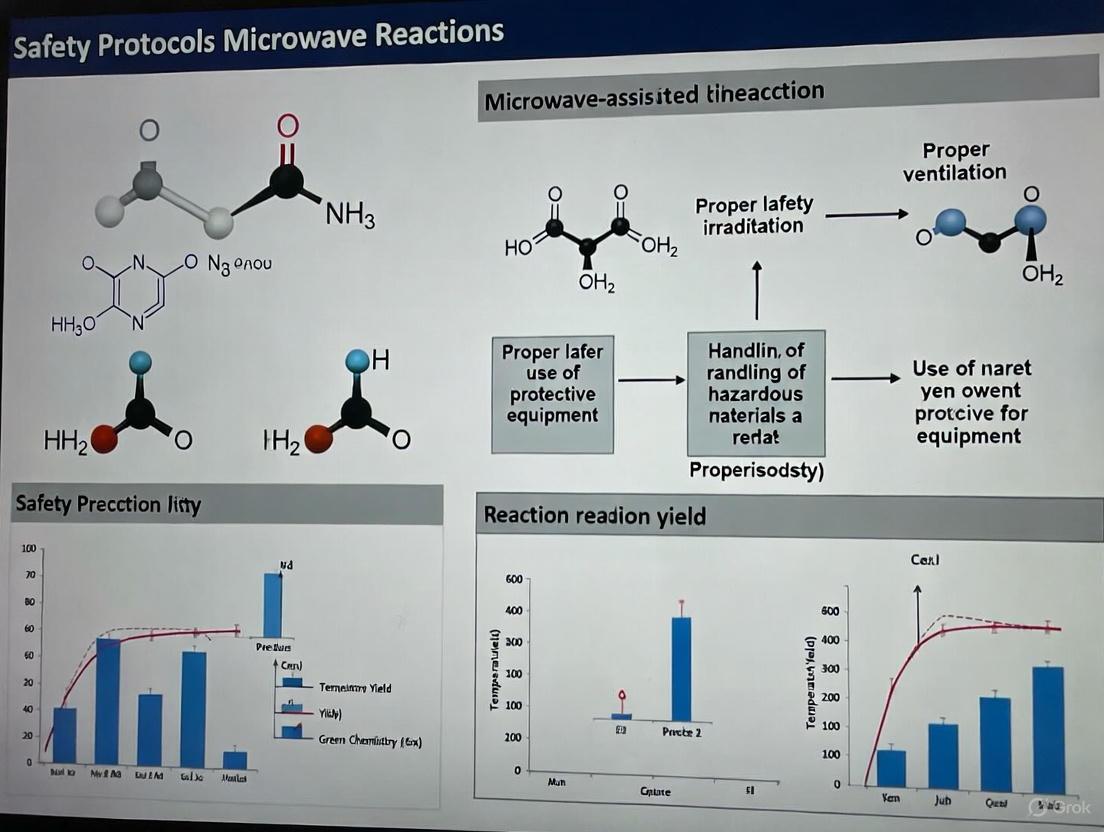
This article provides a critical guide to safety protocols for microwave-assisted chemical reactions, tailored for researchers, scientists, and drug development professionals.
Essential Safety Protocols for Microwave Chemical Reactions: A Comprehensive Guide for Researchers
Abstract
This article provides a critical guide to safety protocols for microwave-assisted chemical reactions, tailored for researchers, scientists, and drug development professionals. It synthesizes current standards and best practices to mitigate risks associated with this powerful technique. The content is structured around four core intents: establishing foundational knowledge of hazards and regulations, detailing methodological setup and application-specific procedures, addressing troubleshooting and process optimization, and validating methods through comparative analysis with conventional techniques. The goal is to empower laboratories to harness the efficiency of microwave chemistry while ensuring a safe working environment and reproducible, high-yield results.
Understanding the Risks: Core Hazards and Regulatory Framework
Microwaves are indispensable in modern research laboratories, enabling rapid heating for chemical synthesis, digestion, and extraction processes. However, their use introduces specific hazards that differ significantly from conventional heating methods. Within the critical context of safety protocols for microwave-assisted chemical reactions, understanding and mitigating the risks of pressure buildup, thermal runaway, and radiation exposure is paramount for researcher safety and experimental integrity. This guide provides targeted troubleshooting and safety protocols to help researchers, scientists, and drug development professionals navigate these hazards effectively.
Understanding the Core Hazards
Pressure Buildup
Pressure buildup occurs when materials are heated in closed vessels. The heating of liquids or solvents generates vapor, leading to a rapid pressure increase that can exceed the vessel's mechanical strength, potentially causing catastrophic failure and explosions [1]. In microwave digestion, for example, internal conditions can reach 180–240°C and 100–150 bar, creating a triple threat of "high temperature, high pressure, and strong acid" [1].
Thermal Runaway
Thermal runaway is an unstable phenomenon where a material's temperature increases uncontrollably while microwave power remains constant. This occurs due to the temperature-dependent dielectric properties of certain materials; as a material heats, it can become more efficient at absorbing microwave energy, leading to a self-accelerating heating cycle and the formation of dangerous "hotspots" [2] [3]. This is a major drawback in processes like microwave defrosting and is a critical concern in the heating of various chemical samples and lunar soil simulants [2] [3].
Radiation
Microwave ovens use non-ionizing electromagnetic radiation to heat food and materials [4] [5]. This radiation is different from ionizing radiation (like X-rays) and does not make food or materials radioactive [5]. The primary biological effect of this non-ionizing radiation is heat, and exposure to high levels can cause thermal burns [6] [4]. Modern microwaves are designed with safety features, such as interlocks that shut off the magnetron when the door is opened, to prevent radiation leaks [4] [5]. The U.S. Food and Drug Administration (FDA) advises against standing directly against or in front of an operating oven as a precaution [5].
Troubleshooting Guides & FAQs
Pressure Buildup and Relief
Q: What causes unexpected pressure relief (venting) in a microwave digestion instrument? A: Primary causes include:
- Contamination: Digestion tank mouths or lids that are contaminated can absorb microwaves and overheat, potentially exceeding 260°C, causing the material to soften and lose pressure resistance [1].
- Equipment Damage: A broken ceramic tube can cause the system to misread conditions and overcompensate with excessive microwave power, leading to temperature失控 (loss of control) and pressure relief [1].
- Improper Load Configuration: Placing digestion tanks unevenly, especially around the main control tank, can shield it from microwaves. This can cause other tanks to overheat and exceed their pressure limits [1].
Troubleshooting Guide: Pressure Buildup
| Observation | Possible Cause | Immediate Action | Corrective Protocol |
|---|---|---|---|
| Frequent or premature pressure release from digestion tank. | Contamination on tank seals or lid; damaged seal. | Stop the run. Allow system to cool completely. | Inspect and thoroughly clean the inner tank mouth and lid before every run [1]. |
| Instrument indicates unstable temperature/pressure. | Broken or damaged ceramic tube in pressure sensor. | Do not continue the experiment. | Check the integrity of the ceramic tube before starting the experiment and replace if damaged [1]. |
| Pressure relief occurs even with low sample mass. | Uneven placement of digestion tanks shielding the main control tank. | Stop the run and reconfigure the tank arrangement. | Ensure digestion tanks are arranged symmetrically according to the manufacturer's manual to ensure even microwave absorption [1]. |
| Solvent vapors detected inside the microwave chamber. | Poorly sealed vessels or operation with flammable solvents. | Immediately ventilate the area. Do not start another cycle. | Ensure all vessels are properly sealed. Use instruments with continuous ventilation and solvent vapor sensors [7]. |
Thermal Runaway
Q: How can I detect thermal runaway during a microwave experiment? A: Key indicators include:
- A sudden, unexpected, and rapid increase in sample temperature reported by sensors [3].
- The formation of localized "hotspots," which can be observed in experiments with solid materials or slurries where one area becomes visibly hotter or undergoes reaction much faster than the rest [3].
- The system's power output may remain constant or even drop while temperature continues to climb uncontrollably [2].
Troubleshooting Guide: Thermal Runaway
| Observation | Possible Cause | Immediate Action | Corrective Protocol |
|---|---|---|---|
| Sample temperature increases rapidly and non-linearly. | Dielectric properties of the material have changed with temperature, leading to more efficient energy absorption. | Implement an immediate and automatic power shut-off or reduction. | Use a staged, low-power temperature ramp program instead of a single high-power setting [1]. |
| "Hotspots" are observed in solid or semi-solid samples. | Non-uniform electric field distribution or uneven sample composition. | Manually abort the run and stir or reposition the sample if safe to do so. | Optimize the microwave program for the specific sample matrix to ensure even heating [1] [3]. |
| Model predicts runaway that sensors do not yet detect. | Advanced process monitoring using observers like an Extended Kalman Filter on a state-space model. | The system automatically adjusts power to avoid the critical runaway zone. | Employ observer-based monitoring to estimate internal temperatures from surface measurements for proactive control [2]. |
Radiation Safety
Q: Is microwave radiation from laboratory ovens a cancer risk? A: No. The radiation used in microwave ovens is non-ionizing. It does not have enough energy to damage DNA or cause mutations that lead to cancer, unlike ionizing radiation such as X-rays or gamma rays [4]. The primary hazard from radiation is thermal injury from high-level exposure, which is prevented by the oven's shielding and interlocks [6] [5].
Q: What should I do if I suspect a radiation leak? A:
- Never operate a damaged oven. Do not use a microwave if the door is damaged, doesn't close securely, or if the seal is visibly compromised [5].
- Inspect door seals regularly for damage or wear and clean them to remove debris that could prevent a proper seal [4].
- As a general precaution, do not stand directly against or in front of a microwave oven while it is operating [5].
- If damage is suspected, discontinue use immediately and contact qualified technical staff for inspection or repair [8].
Essential Safety Protocols & Methodologies
Standard Operating Procedures (SOPs) for Safer Experiments
- Dedicated Equipment: A microwave used in a lab must be dedicated to laboratory purposes only and must never be used for food. It should be clearly labeled: "For Laboratory Use Only—Not for Food" to prevent cross-contamination [9].
- Container Preparation: Always use microwave-safe containers (e.g., specific glass, ceramic, or Teflon). Never use metal, foil, or cracked containers. For closed vessels, always provide a venting mechanism (e.g., a watch glass or loose cap) to prevent dangerous pressure buildup [9].
- Power Management: For sensitive reactions, use a low-power, staged temperature and pressure increase program. The goal is to achieve the desired reaction at the lowest possible temperature to ensure both efficiency and safety [1].
- Personal Protective Equipment (PPE): At a minimum, wear sanitized indirectly vented chemical splash goggles, a lab coat, and appropriate gloves (e.g., vinyl or nitrile). Use secondary containment (e.g., a tray) under containers to catch spills [9].
- Pre-Experiment Equipment Check: Before each use, inspect the microwave door, seals, and hinges for any signs of damage. Never operate a microwave with damaged door seals or hinges due to the risk of radiation leakage [9].
- Emergency Preparedness: A Class ABC fire extinguisher must be located nearby. Post signage on the entrance door (e.g., "Microwave Oven for Laboratory Use Only") and near the microwave itself warning of hot containers [9].
Experimental Protocol: Optimizing a Microwave Digestion Procedure
This methodology outlines key steps for developing a safe and efficient microwave digestion process.
Objective: To safely and completely digest a solid organic sample (e.g., a pharmaceutical intermediate) for subsequent elemental analysis.
Diagram 1: Microwave Digestion Workflow.
Materials:
- Microwave digestion system with temperature and pressure sensors.
- Sealed digestion vessels with pressure relief mechanisms.
- High-purity acids (e.g., HNO₃, HCl).
- Sample material.
Methodology:
- Pre-Experiment Safety Check:
Sample and Reagent Preparation:
- Weigh a precise mass of the solid sample.
- Add the appropriate digestion acid(s) in a fume hood.
Loading and Sealing:
- Carefully place the sample mixture into the digestion vessel.
- Seal the vessel according to the manufacturer's instructions, ensuring the pressure relief mechanism is functional.
Running the Digestion:
- Use a staged, low-power temperature ramp program [1]. For example:
- Ramp Stage: Increase temperature to 120°C over 10 minutes at 60% power.
- Hold Stage: Maintain at 120°C for 5 minutes.
- Ramp Stage: Increase to the target digestion temperature (e.g., 180°C) over 5 minutes at 80% power.
- Hold Stage: Maintain at the target temperature for 15 minutes.
- This gradual approach reduces the risk of rapid pressure buildup and thermal runaway.
- Use a staged, low-power temperature ramp program [1]. For example:
Post-Run:
- Allow the system to cool completely to room temperature inside the closed microwave before opening.
- Vent the digestion vessels in a fume hood before opening fully to release any residual pressure or toxic fumes.
The Scientist's Toolkit
Research Reagent Solutions for Microwave Digestion
| Reagent / Solution | Function & Application | Safety Notes |
|---|---|---|
| Nitric Acid (HNO₃) | A strong oxidizing acid used for digesting organic matrices and dissolving metals. | Highly corrosive. Use with appropriate PPE in a fume hood. Can generate high pressures and NOₓ fumes. |
| Hydrochloric Acid (HCl) | Used for digesting carbonates and some oxides. Often used in acid mixtures. | Corrosive and fumes. Avoid use with certain metals that generate volatile toxic hydrides. |
| Hydrofluoric Acid (HF) | Used for digesting silicates and other refractory materials. | Extremely hazardous, requires specialized PTFE vessels and strict safety protocols. |
| Hydrogen Peroxide (H₂O₂) | Used as an oxidizing adjunct to acids to enhance digestion of organic materials. | Strong oxidizer. Can greatly increase pressure in closed vessels. |
| Optimized Acid Mixtures | Pre-mixed combinations (e.g., HNO₃/HCl or Aqua Regia) to enhance digestion ability and improve element recovery [1]. | Understand the combined chemical hazards. These mixtures are often more aggressive and can generate high heat and pressure upon mixing. |
Key Safety Equipment
| Equipment | Function & Importance |
|---|---|
| Explosion-Proof Microwave | Specifically designed for laboratory use with flammable solvents, preventing ignition of vapors [9]. |
| Ventilated Microwave Chamber | Continuously exchanges air (e.g., 62-100 times/minute) to prevent accumulation of solvent vapors above the lower explosion limit [7]. |
| Solvent Vapor Sensor | Monitors solvent concentration in the exhaust air and automatically shuts off the microwave if a safe threshold is exceeded [7]. |
| Self-Recovering Pressure Relief Valve | A safety valve on digestion tanks that opens at a defined overpressure and then reseals, preventing vessel rupture and batch loss [1]. |
Microwave-assisted synthesis offers significant advantages in speed and efficiency for modern chemical research. However, the rapid energy transfer also introduces unique hazards, particularly when working with flammable solvents, energetic functional groups, and exothermic reactions. Adherence to strict safety protocols is not merely a precaution but a fundamental requirement for any research involving microwave chemistry. This technical support center provides essential troubleshooting guides and FAQs to help researchers, scientists, and drug development professionals navigate these specific hazards safely and effectively.
Troubleshooting Guides
Flammable Solvents
Q1: What are the primary risks of heating flammable solvents in a microwave, and how can they be mitigated? The primary risks include fire, explosion, and pressure buildup from superheating. Flammable solvent vapors can accumulate inside the microwave cavity and, if exposed to an ignition source such as electrical arcing, ignite [7] [11]. Mitigation requires a combination of specialized equipment and rigorous procedures. Laboratory-grade microwave systems are engineered with continuous ventilation that exchanges the cavity air 62-100 times per minute, solvent vapor sensors that automatically shut down the unit if vapor concentration exceeds safe thresholds, and gas flow monitors to ensure ventilation is active [7].
Q2: My protocol requires a flammable solvent. What specific equipment should I use? A domestic microwave oven must never be used with flammable liquids [12] [11]. You must use a laboratory-grade microwave system. These systems feature:
- Reinforced Cavities: Constructed from corrosion-resistant stainless steel to withstand explosive force and chemical corrosion [12].
- Pressure-Sealed Vessels: Designed with robust overpressure safety valves that open at a defined pressure to release vapors and prevent vessel rupture [7].
- Advanced Safety Interlocks: Prevent the generation of microwave energy if the door is not properly sealed [12].
- Ventilation and Monitoring: Integrated systems as described above to prevent vapor accumulation [7].
Energetic Functional Groups and Reaction Pathways
Q1: Which functional groups require heightened caution under microwave irradiation? Compounds containing azide and nitro groups are known to be particularly hazardous, as they can cause explosions under thermal heating conditions [12]. The fast energy transfer of microwave irradiation can significantly accelerate decomposition kinetics. Before performing a reaction, always consult the Stability and Reactivity data (Section 10) in the Material Safety Data Sheet (MSDS) for all reagents to understand their behavior at high temperatures [12].
Q2: How should I approach a new reaction with potentially energetic compounds? A cautious, scaled-down approach is critical.
- Start Small: Use minimal amounts of reagents to limit potential energy release in case of an incident [12].
- Low Power Initiation: Begin with low power levels and temperatures to observe the reaction behavior [12].
- Understand the Kinetics: Be aware of the potential reaction kinetics. A rapid exothermic process can produce pressure and heat faster than the vessel's venting mechanisms can relieve, leading to vessel failure [12].
Exothermic Reactions
Q1: Why are exothermic reactions particularly dangerous in a microwave? Exothermic reactions are self-heating. When combined with the rapid volumetric heating of microwaves, they can lead to thermal runaway—an uncontrolled, self-accelerating increase in temperature and pressure [12] [13]. This can happen at an "alarmingly fast rate," exceeding the safety limits of the reaction vessel [12].
Q2: What protocols and equipment features help manage exothermic reactions?
- Internal Temperature Monitoring: An infrared (IR) sensor alone may be insufficient due to slow response times. Using an internal fiber-optic temperature probe is strongly recommended to accurately monitor the true reaction temperature, especially during rapid changes [14].
- Power Cycling: Laboratory instruments use automatic power cycling to maintain set temperatures. For an exothermic reaction, the system will lower microwave power as the reaction approaches the set temperature, providing a critical control mechanism [12].
- Heating-While-Cooling: This feature (microwave irradiation with simultaneous compressed air cooling) can help manage the heat from exotherms. However, note that during cooling, the external IR sensor can read up to 60°C lower than the actual internal temperature, making an internal sensor essential [14].
- Containment: A laboratory microwave system is designed to contain the energy of a vessel failure, preventing injury and allowing the equipment to be cleaned and returned to service [12].
Frequently Asked Questions (FAQs)
Q: Can I use a kitchen microwave in the lab if I'm careful? A: No. Domestic microwave ovens are unequivocally unsuitable and dangerous for laboratory chemistry. They lack the reinforced cavities, pressure and temperature monitoring, specialized ventilation, and safety interlocks required to handle chemical reactions safely. Using them with flammable liquids presents an "unacceptable risk" [12] [11].
Q: Is it safe to use metal catalysts in microwave reactions? A: Yes, but with important distinctions. Small amounts of grounded metal catalysts are generally safe and will not cause arcing. However, metal filings and other ungrounded metals should be avoided, as they can act as an arc source within the microwave field. Furthermore, a metallic coating on the vessel wall from a reaction can absorb energy extremely well and potentially melt the reaction tube [12].
Q: What is the correct procedure for sealing reaction vessels? A: Vessels must be properly sealed to withstand pressure but must never be completely sealed shut. Always provide a means of pressure relief. For sealed vessel reactions, use vessels certified by the microwave manufacturer that include a safety valve [7]. "Always leave venting (e.g., watch glass or loose caps) to prevent pressure buildup" [15]. Never operate a microwave in a fully sealed system without a validated pressure-release mechanism.
Q: What Personal Protective Equipment (PPE) is required? A: At a minimum, researchers must wear:
- Sanitized, indirectly vented chemical splash goggles [15].
- A lab coat [15].
- Appropriate vinyl or nitrile gloves [15].
- Secondary containment (e.g., a tray) should be used under containers to catch spills [15].
Q: What should I do if I see sparks or a fire inside the microwave? A: 1. Keep the door closed. 2. Immediately turn off and disconnect the microwave from power. Keeping the door closed will smother the fire by depriving it of oxygen. Do not open the door until you are sure the fire is out and the unit has cooled. For fires that do not self-extinguish or breach the microwave cavity, evacuate and call for emergency services. A Class ABC fire extinguisher should be located nearby [15] [13].
Quantitative Data and Protocols
Solvent Superheating Energy Release
The table below summarizes the energy released from the superheating of common solvents, which contributes to the overall stored energy risk in a reaction vessel [11].
Table 1: Energy Released from Superheating of Common Solvents
| Solvent | Boiling Point (°C) | Superheat Temperature (°C) | Energy Released (J/mL) |
|---|---|---|---|
| Acetonitrile | 81.6 | 117 | 127.6 |
| Acetone | 56.5 | 93 | 102.5 |
| Ethanol | 78.9 | 113 | 181.5 |
| Hexane | 69.0 | 137 | 132.2 |
| Methanol | 64.6 | 84 | 149.2 |
| Water | 100.0 | 105 | 109.0 |
Experimental Protocol: Safe Method Scouting for New Reactions
This protocol provides a methodology for safely assessing a new microwave-assisted reaction, particularly one with unknown exothermic potential or involving sensitive functional groups.
1. Pre-Experiment Hazard Analysis:
- Review MSDS: Examine Section 10 (Stability and Reactivity) for all chemicals [12].
- Literature Search: Investigate if similar reactions or the same functional groups have been reported under microwave conditions.
- Theoretical Energy Assessment: For the planned scale, estimate the potential energy release using data like that in Table 1.
2. Small-Scale Screening:
- Scale: Start with a very small scale (e.g., 0.5 - 2 mL total volume).
- Vessel: Use a manufacturer-certified pressure vessel.
- Temperature Monitoring: Employ both IR and an internal fiber-optic probe if available [14].
- Parameters: Set a conservative temperature limit (e.g., 80-100°C) and a low power setting.
- Observation: Closely monitor the reaction profile for any rapid temperature or pressure spikes.
3. Scaled-Up Reaction:
- Only after a successful and safe small-scale screening should the reaction be scaled up.
- Increase the scale gradually.
- Ensure the vessel size is appropriate for the reaction volume (do not overfill).
Safety Assessment Workflow
The following diagram outlines the logical decision-making process for assessing chemical hazards prior to a microwave experiment.
Diagram 1: Pre-Experiment Hazard Assessment Workflow
The Scientist's Toolkit: Essential Research Reagent Solutions
The table below details key materials and equipment essential for conducting safe and effective microwave-assisted chemistry.
Table 2: Essential Materials and Equipment for Microwave Chemistry
| Item Name | Function / Explanation |
|---|---|
| Laboratory-Grade Microwave Reactor | Instrument with reinforced cavity, temperature/pressure monitoring, safety interlocks, and ventilation. It is mandatory for containing explosions and managing vapors [12]. |
| Certified Pressure Vessels | Reaction vessels supplied by the instrument manufacturer, designed to withstand specific pressures and temperatures, and equipped with pressure-release valves [12] [7]. |
| Internal Fiber-Optic Temperature Probe | Provides accurate internal reaction temperature measurement, crucial for exothermic reactions and heating-while-cooling applications where IR sensors are unreliable [14]. |
| Secondary Containment Trays | Placed under reaction vessels to catch spills, preventing contamination of the microwave cavity and mitigating slip/contact hazards [15]. |
| Solvent Vapor Sensor | (Typically integrated into the microwave) Monitors the concentration of organic solvents in the exhaust air and automatically shuts down the system if safe thresholds are exceeded [7]. |
| Class ABC Fire Extinguisher | Located near the microwave work area for emergency response to electrical, flammable liquid, and common material fires [15]. |
Biological and Contamination Risks in Shared Laboratory Spaces
Frequently Asked Questions (FAQs)
Q1: What are the primary biological and contamination risks when using microwaves in a shared lab? The main risks in a shared laboratory setting are cross-contamination and exposure to biological or chemical hazards. Using a single microwave unit for both laboratory procedures (e.g., heating chemicals, melting agar) and food is a significant contamination hazard [16]. Furthermore, spills of biological materials must be cleaned immediately, as residues can carbonize or release harmful fumes. In a shared space, the risk of cross-contamination between different lab groups is heightened, requiring vigilant work practices and clear communication [17].
Q2: What specific safety protocols are mandatory for microwave use with biological samples? When using microwaves for biological work, such as melting agar or warming media, specific safety protocols must be followed [16]:
- Personal Protective Equipment (PPE): At a minimum, wear sanitized indirectly vented chemical splash goggles, a lab coat, and vinyl or nitrile gloves.
- Spill Management: Clean up any biological spills immediately to prevent carbonization and fume release.
- Containment: Use secondary containment (e.g., a tray) under containers to catch spills.
- Venting: Always leave containers vented (e.g., with a watch glass or loose caps) to prevent a dangerous pressure buildup during heating.
Q3: How should a microwave be designated and placed in a shared laboratory space? A microwave in a lab must be dedicated to laboratory purposes only and never used for food. It should be clearly labeled with signage such as “For Laboratory Use Only—Not for Food” [16]. For placement [16]:
- Locate the microwave in a well-ventilated area away from flammable materials.
- Plug it directly into a GFI-protected wall receptacle; extension cords should not be used.
- Ensure the microwave does not block egress paths or crowd benchtops.
Q4: What are the key emergency response steps for a spill or exposure incident involving a microwaved biological agent? In the event of a spill or exposure [17]:
- Notify neighbors and ask for help immediately. Have a communication plan for such emergencies.
- Know the locations of and keep clear access to emergency equipment like eye washes and safety showers.
- For significant incidents, especially with hazardous materials, notify all neighboring groups in the shared space.
- Have a plan for the worst-case scenario, considering the specific biological agents in use.
Troubleshooting Guides
Problem: Contamination of a Laboratory Microwave
| Troubleshooting Step | Detailed Methodology | Underlying Rationale |
|---|---|---|
| 1. Decontaminate | Prepare a fresh 10% bleach solution or an appropriate laboratory disinfectant. Apply thoroughly to all interior surfaces, including the turntable and door seals. Allow for the recommended contact time before rinsing with sterile water, if required. | This step eliminates or neutralizes biological contaminants that may have been aerosolized or spilled during a previous heating cycle, preventing cross-contamination [16]. |
| 2. Establish a SOP | Develop and post a written Standard Operating Procedure (SOP) for the microwave's use, cleaning, and decontamination. Mandate that all users sign and acknowledge the SOP. | An SOP ensures consistent and safe practices across all users in the shared space, providing a formal protocol for maintaining a contamination-free environment [16]. |
| 3. Reinforce Labeling | Ensure the microwave has clear, unambiguous labels: "For Laboratory Use Only" and "Not for Food." Post additional signage warning of hot container hazards. | Clear, dedicated-use labeling is a primary control to prevent the introduction of food, which is a major contamination vector, and to alert users to other physical hazards [16] [17]. |
Problem: Uncontrolled Pressure Buildup During Microwave Heating
| Troubleshooting Step | Detailed Methodology | Underlying Rationale |
|---|---|---|
| 1. Verify Venting | Before starting any heating procedure, confirm the container is not sealed. Use a loose cap or place a watch glass slightly askew on the vessel to allow vapor to escape. | Reactions in closed vessels under microwave irradiation can lead to uncontrolled temperature and pressure increases, creating an explosion hazard [16] [18]. |
| 2. Check Container Integrity | Inspect all glassware for cracks, stars, or other damage before use. Use only microwave-safe glassware and ensure no metal or foil is present. | Cracked containers can fail under pressure. Metal can cause arcing, which poses a fire risk and can ignite flammable solvent vapors [16] [18]. |
| 3. Use Secondary Containment | Place the reaction vessel inside a larger, robust secondary container, such as a polypropylene tray. | Secondary containment will catch spills or contents in the event of a primary vessel failure, protecting the microwave cavity and users from exposure [16]. |
The Scientist's Toolkit: Essential Reagents and Materials
| Item | Function in the Context of Microwave Safety |
|---|---|
| Secondary Containment Trays | Catches spills from the primary container, preventing contamination of the microwave oven's cavity and protecting users from exposure [16]. |
| Microwave-Safe Lab Glassware | Specialized glassware designed to withstand rapid internal heating and pressure changes without cracking, preventing release of contents [16]. |
| Appropriate Disinfectants | Used for routine decontamination of the microwave interior and for immediate cleanup of biological spills to prevent fume release and cross-contamination [16] [19]. |
| Warning Signage & Labels | Clearly designates equipment for "Laboratory Use Only," warns of specific hazards (e.g., hot surfaces, biohazards), and reinforces safety protocols in a shared space [16] [17]. |
Experimental Workflow for Safe Microwave Use
The diagram below outlines a logical workflow for the safe and effective use of a microwave in a shared laboratory setting, integrating key safety checks and protocols.
Microwave ovens, when used in scientific research for chemical reactions, present a unique set of hazards that extend beyond their typical kitchen applications. Their use in accelerating chemical processes, such as digestion, extraction, and synthesis, requires strict adherence to a framework of safety standards to mitigate risks of fire, explosion, chemical exposure, and radiation leakage. Navigating the regulatory landscape is essential for maintaining a safe laboratory environment. This technical support center guide outlines the critical regulations from the Occupational Safety and Health Administration (OSHA), the National Fire Protection Association (NFPA), and the Food and Drug Administration (FDA), providing researchers with clear protocols and troubleshooting advice to ensure safety and compliance [20] [21].
The table below summarizes the core regulatory bodies and their primary focus concerning microwave use in laboratory settings.
Table 1: Key Regulatory Agencies and Standards
| Agency | Primary Focus | Key Standard/Requirement | Application to Lab Microwaves |
|---|---|---|---|
| OSHA | Worker safety and health [21] [22]. | 29 CFR 1910.1450 (Laboratory Standard); General Duty Clause [23]. | Requires Chemical Hygiene Plans, hazard evaluations, training, and PPE for handling chemicals [20] [23]. |
| FDA | Radiation safety and product performance [24]. | 21 CFR 1030.10 (Performance Standard) [24]. | Limits microwave radiation leakage; requires safety interlocks [24]. |
| NFPA | Fire prevention and protection [20]. | NFPA 45 (Fire Protection for Laboratories) [20]. | Governs placement and controls for microwaves, especially when heating flammable materials [20]. |
Essential Safety Protocols
Equipment Selection and Installation
- Dedicated Use: Microwaves used in a lab must be for laboratory purposes only and never for food. The unit must be clearly labeled: “For Laboratory Use Only—Not for Food” to prevent cross-contamination [20].
- Approved Equipment: Standard household microwave ovens are not designed or certified for industrial or laboratory use, as their safety instructions explicitly prohibit the use of corrosive chemicals or vapors [21]. Where possible, use explosion-proof, laboratory-grade microwaves, especially when working with flammable solvents [20].
- Proper Placement: The microwave should be located in a well-ventilated area, away from flammable materials. It must be plugged directly into a GFI (Ground Fault Interrupter)-protected wall receptacle—extension cords are prohibited per OSHA electrical safety standards [20].
Operational Procedures
- Standard Operating Procedures (SOPs): Laboratories must develop and maintain written SOPs specific to microwave use, as required by the OSHA Laboratory Standard [20] [23].
- Personal Protective Equipment (PPE): At a minimum, users must wear sanitized, indirectly vented chemical splash goggles, a lab coat, and vinyl or nitrile gloves [20].
- Container Safety: Use only microwave-safe glassware. Never use metal, foil, or cracked containers. To prevent dangerous pressure buildup, never heat sealed vessels; always provide venting (e.g., with a watch glass or loose caps) [20] [24].
- Spill Management: Clean up all chemical or biological spills immediately to prevent residue carbonization and fume release [20].
Troubleshooting Common Issues
Table 2: Troubleshooting Guide for Laboratory Microwave Use
| Problem | Potential Cause | Immediate Action | Preventive Measure |
|---|---|---|---|
| Super-heated Liquid Explosion | Water or liquids heated beyond boiling point without nucleation [24]. | Wait 30 seconds before handling, place cup on a stable surface, and agitate carefully with a stir rod. | Avoid heating pure water for extended times; add a stirring device or boiling chip before heating [24]. |
| Fire or Smoke Inside Oven | Heating flammable solvents or using inappropriate containers [20] [21]. | Keep door closed and turn off the oven. Use a Class ABC fire extinguisher if safe to do so. | Only heat flammables in an explosion-proof microwave. Use secondary containment and verify container compatibility [20]. |
| Oven Operates with Door Open | Failure of safety interlock systems [24]. | Immediately discontinue use and unplug the oven. Do not use the oven. | Never defeat the door interlock switches. Have the unit serviced by a qualified professional [24]. |
| Strong Chemical Odors During/After Use | Heated chemicals releasing vapors; spill or residue inside cavity [21]. | Turn off and ventilate the area. Wear appropriate PPE before cleaning. | Ensure proper venting of containers. Clean the oven cavity regularly and inspect for damage [20]. |
| Sparks Inside Oven (Arcing) | Metal object (utensil, foil, metal-trimmed container) inside [24]. | Turn off the microwave immediately. | Use only microwave-safe, non-metal containers. Inspect glassware for metallic elements [24]. |
Frequently Asked Questions (FAQs)
Q1: Can I use a regular kitchen microwave in my lab if I only use it for water baths? No. Household microwaves are listed and labeled under safety standards (like UL 923) that explicitly state they are "not designed for industrial or laboratory use." Using them in a lab violates the instructions included in their listing, which is against OSHA regulations [21]. Furthermore, using the same unit for lab work and food is a serious contamination hazard [20].
Q2: What should I do if I suspect my microwave oven is leaking radiation? First, do not use it. The FDA states that a microwave in good condition should not leak. Radiation leakage is most likely from damaged door seals, hinges, latches, or a door that doesn't close firmly. Visually inspect the oven for damage and do not operate it if any is found. Contact the manufacturer or a qualified service provider for assistance [24].
Q3: What are the specific PPE requirements for operating a lab microwave? The minimum PPE for using a microwave in a lab setting includes sanitized indirectly vented chemical splash goggles, a lab coat, and appropriate gloves (e.g., vinyl or nitrile) resistant to the chemicals being used [20].
Q4: Are there specific requirements for the electrical setup of a lab microwave? Yes. OSHA electrical safety standards require that the microwave be plugged directly into a wall outlet. The use of extension cords is prohibited. The receptacle should be GFI (Ground Fault Interrupter)-protected for safety [20].
Q5: What is the number one safety takeaway for microwave use in chemical research? Segregation of use. The most fundamental rule is to never use a microwave for food and laboratory work. A microwave used in a lab must be dedicated, permanently labeled for lab use only, and operated under a written Standard Operating Procedure that addresses chemical hazards [20].
The Scientist's Toolkit: Essential Research Reagent Solutions
Table 3: Essential Materials for Microwave-Assisted Chemical Reactions
| Item | Function/Explanation |
|---|---|
| Microwave-Safe Glassware | Specialized containers (e.g., reaction vessels) made from materials like Teflon or specific borosilicate glasses that can withstand rapid temperature changes and are transparent to microwaves. They must not contain metal [20] [24]. |
| Secondary Containment Trays | A spill containment tray placed inside the microwave to catch any leaks or spills from the primary container, preventing contamination of the oven cavity [20]. |
| Venting Apparatus | Devices like watch glasses or caps with loose-fitting lids used to cover containers. They allow for pressure equalization, preventing the buildup of pressure that could lead to an explosion [20]. |
| Class ABC Fire Extinguisher | A fire extinguisher located near the microwave work area that is effective against fires involving ordinary combustibles (A), flammable liquids (B), and electrical equipment (C) [20]. |
| High-Temperature Gloves | Heat-resistant gloves used for handling hot containers after microwaving, separate from the chemical-resistant gloves worn during setup [20]. |
Experimental Safety Workflow
The following diagram illustrates the logical workflow for safely planning and executing a microwave-assisted experiment, integrating the regulatory and safety protocols outlined in this guide.
In microwave-assisted chemical synthesis, advanced instrumentation provides powerful capabilities, but the most critical safety component remains the trained and knowledgeable operator [12]. Proper training encompasses understanding equipment limitations, reaction kinetics, and emergency protocols. This technical support center provides essential troubleshooting guides and FAQs to empower researchers and scientists in drug development to perform microwave chemical reactions safely and effectively.
Troubleshooting Guides and FAQs
Frequently Asked Questions
Can I use a domestic microwave oven for chemical synthesis? No. Domestic microwave ovens lack safety controls for power, temperature, and pressure monitoring. Their cavities are not designed to withstand corrosive chemicals or the explosive force of a vessel failure, and their safety interlocks can be compromised [12]. Always use laboratory-grade microwave systems specifically designed for chemical synthesis [12] [25].
Is it safe to use metal catalysts in microwave-assisted reactions? Yes, small amounts of ground metal catalysts are generally safe and will not cause arcing. However, you should avoid metal filings and other ungrounded metals, as these can arc within the microwave field [12].
What should I do if I suspect a radiation leak from the microwave? Do not operate a damaged microwave oven. Regularly inspect the door seals, hinges, and latches. If you suspect a leak, cease operations immediately and contact your institution's radiation safety officer for testing [26] [5].
Why is my reaction vessel failing or cracking? Vessel failures can result from exceeding pressure or temperature ratings, using vessels beyond their serviceable lifetime, or attempting to heat sealed containers. Ensure you are using manufacturer-certified vessels and never exceed the recommended load limits [12] [27].
Troubleshooting Common Issues
Problem: Arcing or sparks inside the microwave cavity.
- Potential Causes: Presence of metallic objects (e.g., foil, metal-containing stir bars), or a metallic coating on the vessel wall from a previous reaction [12] [26].
- Solutions: Use only microwave-safe, non-metal vessels and stir bars. Ensure all glassware is free of metallic residues. For solvent-free reactions with adsorbed reagents, ensure adequate stirring to prevent localized heating and metallic coating [12].
Problem: Unexpected pressure buildup or vessel venting.
- Potential Causes: Exothermic reaction runaway, using a solvent or reagent unstable at high temperatures, or attempting to heat a sealed container [12] [25].
- Solutions: Always be aware of the reaction kinetics and the thermal stability of your chemicals by consulting the Material Safety Data Sheet (MSDS) [12]. For open-vessel work, never seal the container; instead, use loose caps or a watch glass to allow venting [25]. Start with low power and temperature settings for new reactions [12].
Problem: Reaction mixture overheats or decomposes rapidly.
- Potential Causes: Power level set too high, inadequate stirring leading to localized superheating, or the reaction mixture is too absorbing [12] [28].
- Solutions: For new or unfamiliar reactions, start with a low power level (e.g., 50 W) and gradually increase if needed [28]. Ensure proper and adequate stirring, especially for viscous samples or solvent-free reactions [12].
Experimental Protocols for Safe Microwave Synthesis
Method Development Workflow for Pressurized Reactions
The following diagram outlines the logical workflow for developing a safe and effective method for a pressurized microwave-assisted reaction.
Key Parameter Selection
Vessel Selection: Pressurized vs. Atmospheric
- Pressurized (Sealed Vial): Ideal for small-scale reactions (typically < 10 mL). The key advantage is the ability to heat solvents far above their atmospheric boiling points (e.g., dichloromethane to 180°C), which can dramatically enhance reaction rates. It also provides an inert atmosphere for sensitive reagents [28].
- Atmospheric (Open Vessel): Used for larger-scale reactions and allows the use of standard round-bottom flasks with reflux condensers or other apparatus. While rate enhancements are less dramatic than in closed vessels, reactions are still significantly faster than conventional methods [28].
Solvent Selection
The polarity of a solvent is a crucial factor in microwave-assisted reactions. The following table categorizes common solvents based on their ability to absorb microwave energy.
Table 1: Microwave Absorption of Common Solvents [28]
| Absorption Level | Solvent Examples |
|---|---|
| High | Ethanol, Methanol, Water |
| Medium | Acetonitrile, Dichloromethane, DMF |
| Low | Benzene, Toluene, Hexane |
Setting Temperature, Time, and Power
- Temperature: For pressurized reactions, a good starting point is 10°C above the conventional reaction temperature. For atmospheric reflux, set the temperature at least 50°C above the solvent's boiling point [28].
- Time: A starting point for pressurized reactions is 5-10 minutes. For open-vessel reactions, reference the conversion guide below [28].
- Power: For new reactions in closed vessels, always start with a low power level (e.g., 50 W) to prevent violent pressure surges. You can increase power if the reaction struggles to reach temperature [28].
Table 2: Guide for Setting Microwave Reaction Times [28]
| Conventional Reaction Time | Suggested Microwave Time |
|---|---|
| 4 hours | 10 minutes |
| 8 - 18 hours | 30 minutes |
| > 18 hours | 1 hour |
The Scientist's Toolkit: Essential Materials and Safety Equipment
Table 3: Key Research Reagent Solutions and Safety Equipment
| Item | Function / Purpose |
|---|---|
| Laboratory-Grade Microwave System | Designed with reinforced cavities, safety interlocks, and pressure/temperature monitoring to safely contain vessel failures and corrosive gases [12] [29]. |
| Manufacturer-Certified Vessels | Pressure tubes and accessories tested and certified for use in a specific microwave cavity to prevent failure under high pressure and temperature [12]. |
| Microwave-Absorbing Solvents | Polar solvents (e.g., water, ethanol) that efficiently couple with microwave energy to rapidly heat the reaction mixture [28]. |
| Material Safety Data Sheet (MSDS) | Provides critical information on the stability and reactivity of chemicals at high temperatures, allowing for hazard evaluation [12]. |
| Personal Protective Equipment (PPE) | Minimum PPE includes indirectly vented chemical splash goggles, a lab coat, and heat-resistant gloves (e.g., vinyl or nitrile). A face shield is advised when handling large quantities of heated materials [25] [27]. |
| Secondary Containment Tray | Placed under reaction vessels to catch spills and prevent contamination of the microwave cavity [25]. |
Implementing Safer Practices: Equipment, PPE, and Standard Operating Procedures
Hardware Comparison: Laboratory vs. Domestic Microwaves
The choice between a laboratory-grade microwave and a repurposed domestic unit is a critical safety and performance decision for any research setting. Domestic microwave ovens are not designed for the rigors of laboratory usage and present significant safety risks, including corrosion, inadequate containment of vessel failures, and compromised safety interlocks [12].
The table below summarizes the key distinctions between the two types of equipment.
| Feature | Laboratory-Grade Microwave | Domestic Microwave Oven |
|---|---|---|
| Primary Design Purpose | Laboratory material processing (e.g., heating reagents, drying slides) [30] [31] | Heating food and beverages [32] |
| Cavity & Door Construction | Reinforced, corrosion-resistant stainless steel cavity and door; designed to contain vessel failures [12] | Standard metal interior; not designed to withstand chemical corrosion or explosive pressure [12] |
| Safety Monitoring & Controls | Integrated monitoring of power, temperature, and pressure with automatic safety controls [12] | No safety controls or monitoring for laboratory parameters [12] |
| Venting System | Powered cavity ventilation to remove hazardous fumes [30] [31] | Basic ventilation not designed for chemical fumes |
| Safety Interlocks | Maintained integrity to stop microwave generation upon door opening [12] | Interlocks can be compromised by corrosion, allowing operation with the door open [12] |
| Typical Cost | ~$2,999 (e.g., BP-090 model) [30] [31] | ~$100 - $500 |
Safety Protocols for Microwave-Assisted Reactions
General Operating Procedures
- Dedicated Use: Any microwave used in a lab must be dedicated solely to laboratory purposes and must be clearly labeled: “For Laboratory Use Only—Not for Food.” Using the same unit for heating chemicals/biological samples and food creates a serious contamination hazard [33].
- Placement & Electrical Safety: The microwave should be placed in a well-ventilated area, away from flammable materials. It must be plugged directly into a GFCI-protected wall receptacle without using an extension cord [33].
- Personal Protective Equipment (PPE): At a minimum, operators must wear sanitized indirectly vented chemical splash goggles, a lab coat, and heat-resistant gloves (e.g., vinyl or nitrile). Use secondary containment (e.g., a tray) under containers to catch spills [33] [34].
Chemical & Biological Use Protocols
- Flammable Solvents: Do not heat flammable solvents unless using an explosion-proof laboratory-grade microwave. Most microwave ovens are not designed for this extreme hazard [33] [34].
- Container Safety: Only use microwave-safe glassware. Do not use metal containers, foil, or cracked glassware. Never heat sealed containers; always provide venting (e.g., with a watch glass or loose cap) to prevent dangerous pressure buildup [33] [34].
- Preventing Superheating: To prevent the super-heating of liquids, which can lead to violent eruptions, add a stirring agent (e.g., a clean magnetic stir bar) or avoid heating smooth-sided containers for extended periods [24] [34].
Troubleshooting and FAQs
Q: Our microwave is running but not heating the sample. What could be the cause? A: If the oven's light and turntable are functioning but no heat is produced, the issue could be a faulty door switch, a damaged magnetron, or a failed high-voltage diode [35]. Caution: These internal components contain extremely high voltages, even when unplugged. Diagnosis and repair should only be performed by a qualified professional [8].
Q: Can I use my domestic kitchen microwave in the lab if I'm careful? A: No. Household microwaves should never be used in a laboratory [34]. They are not designed to withstand corrosive chemicals, lack reinforced doors to contain explosions, and their safety interlocks can fail in a laboratory environment, creating serious risks [12].
Q: What should I do if I see sparks (arcing) inside the microwave cavity? A: Immediately turn off and unplug the microwave. Arcing is often caused by the presence of metal (e.g., a forgotten stir bar, aluminum foil) or a buildup of carbonized chemical residues on the cavity wall. Inspect and clean the cavity thoroughly once it has cooled [34] [12].
Q: How often should a laboratory microwave be inspected? A: Conduct a visual inspection before each use, checking the door, seals, and hinges for any damage. A more formal inspection for microwave leakage and general maintenance should be performed on a regular schedule, or anytime damage is suspected [33] [24].
The Scientist's Toolkit: Essential Reagents & Materials
The table below lists key materials used in microwave-assisted laboratory work.
| Item | Function / Use | Critical Safety Notes |
|---|---|---|
| Microwave-Safe Glassware | For holding samples during heating; must allow microwaves to pass through. | Use only loose caps or watch glasses for venting. Never use sealed containers [33] [34]. |
| Stainless Steel Pressure Vessels | Certified sealed vessels for performing reactions under elevated pressure and temperature. | Must be used only with the laboratory-grade microwave system they are designed for [12]. |
| Agar | Used for microbiological media preparation. | When reheating, ensure it is chopped up and not allowed to solidify in a sealed mass to prevent explosive vaporization [34]. |
| Magnetic Stir Bars | For ensuring even heating and mixing of samples. | Must be microwave-safe and not coated with a material that could melt. Ensure they are removed if not in use to prevent arcing [12]. |
| Thermal Gloves & Face Shield | For personal protection when handling hot containers after heating. | Always wear appropriate PPE when removing heated items from the microwave [34]. |
In scientific research, microwave reactors are powerful tools for accelerating chemical synthesis. However, their use introduces unique hazards, including the risk of explosive vessel failure, exposure to toxic fumes, and fire. A robust safety framework is non-negotiable. This guide details the three essential engineered safety features that form the foundation of safe microwave-assisted chemistry: reinforced cavities, pressure and temperature monitoring, and venting mechanisms. Adherence to these protocols protects personnel, ensures experimental integrity, and aligns with the stringent safety standards required in modern laboratories [12].
Frequently Asked Questions (FAQs)
FAQ 1: Why can't we use a domestic microwave oven for chemical reactions? Domestic microwaves are designed for heating food and lack critical safety engineering. Their cavities are not reinforced to withstand the explosive force of a runaway reaction, and their interiors can be corroded by acids and solvents. Most critically, they do not have safety controls for monitoring reaction pressure and temperature in real-time, creating a high risk of vessel failure and exposure to hazardous materials. Using them for lab work violates safety standards like OSHA 29 CFR 1910.303(b)(2), which requires equipment to be used per its listing instructions, which for domestic units explicitly forbid laboratory use [12] [21].
FAQ 2: What is the single most important safety device in the lab? While engineered features are crucial, the most important safety device is a trained and knowledgeable operator. A skilled researcher who understands the equipment, the chemistry being performed, and the associated hazards is the first and best defense against accidents [12].
FAQ 3: Our reaction involves flammable solvents. What special precautions are needed? Flammable solvents must only be heated in an explosion-proof, laboratory-grade microwave. Standard laboratory microwaves are not designed to prevent the ignition of flammable vapors that can build up inside the cavity. You must verify that your equipment is rated for this use and that all vessels are properly vented to prevent pressure buildup [36].
FAQ 4: How often should microwave safety components be inspected? A visual inspection should be performed before each use. Check the door, seals, and hinges for any signs of damage, wear, or corrosion. Never operate a microwave with faulty seals, as this can lead to microwave radiation leakage. Regular professional maintenance should also be conducted as per the manufacturer's schedule [36] [27].
Troubleshooting Guides
Guide 1: Pressure and Temperature Monitoring Failures
Pressure and temperature sensors are critical for preventing catastrophic vessel failure by allowing the system to regulate power before safe limits are exceeded.
- Problem: Inconsistent or erratic pressure/temperature readings.
- Potential Cause: Sensor damage or coating by reaction residues.
- Solution: Power down the system. Inspect and clean the sensors according to the manufacturer's instructions. Do not use abrasive materials. If the problem persists, contact technical support.
- Problem: System fails to maintain set temperature.
- Potential Cause: Inadequate stirring, leading to localized superheating.
- Solution: Ensure a sufficiently large stir bar is used and that stirring is effective, especially for viscous samples or solvent-free reactions [12].
- Problem: Safety interlocks engage, shutting down the reaction prematurely.
- Potential Cause: The reaction kinetics are too exothermic, causing a rapid spike in pressure/temperature that exceeds the instrument's safety shutdown threshold.
- Solution: Re-evaluate the reaction chemistry. Start with small amounts of reagents and lower power levels to understand the reaction kinetics before scaling up [12].
Guide 2: Venting Mechanism and Cavity Integrity Issues
Venting mechanisms prevent over-pressurization, while a reinforced cavity contains any vessel failure.
- Problem: Solvent or reaction mixture is found inside the microwave cavity after a run.
- Potential Cause: Vessel overfilling or a failure of the venting mechanism to properly contain vapors.
- Solution: Ensure containers are filled no more than two-thirds full. Inspect the vessel's venting mechanism for clogs or damage. Clean the cavity thoroughly before the next use to prevent corrosion and fire hazards [27].
- Problem: Visible damage (dents, melting, corrosion) to the interior cavity.
- Potential Cause: Use of non-certified vessels, arcing from metal components, or a previous vessel failure.
- Solution: Immediately take the unit out of service. Only use vessels and accessories certified by the manufacturer. Never place metals, foil, or cracked glassware inside the cavity. The cavity must be inspected and repaired by a qualified technician [12] [27].
- Problem: Persistent chemical odors or visible vapor release from the microwave.
- Potential Cause: The microwave is not placed in a well-ventilated area, or a vessel has leaked.
- Solution: Always operate the laboratory microwave inside a functioning fume hood to eliminate inhalation of toxic fumes. Inspect all vessels and seals for integrity [12].
Experimental Safety Protocols
Pre-Experiment Safety Checklist
Before initiating any microwave-assisted reaction, complete this checklist:
- Training & SOPs: I have been trained on this equipment and have reviewed the Standard Operating Procedure (SOP) for this specific reaction [36].
- MSDS Review: I have reviewed the Material Safety Data Sheets for all chemicals, noting stability and reactivity at high temperatures [12].
- Equipment Inspection: I have inspected the microwave door, seals, and cavity for damage. The unit is plugged directly into a GFI wall outlet [36] [27].
- Vessel Check: I am using manufacturer-certified vessels. The containers are not sealed and are vented (e.g., loose cap) to prevent pressure buildup [36] [12].
- Volume Control: The reaction vessel is not filled beyond two-thirds of its capacity [27].
- PPE: I am wearing appropriate PPE: a lab coat, indirectly vented chemical splash goggles, and heat-resistant gloves (nitrile/vinyl). A face shield is available for handling large quantities [36] [27].
- Hood Placement: The microwave is located inside a functioning fume hood [12].
- Fire Safety: A Class ABC fire extinguisher is accessible nearby [36].
Standard Operating Procedure for a Safe Microwave Reaction
Title: General SOP for Microwave-Assisted Synthesis Objective: To safely perform a microwave-assisted chemical reaction using controlled parameters. Hazards: High temperature, high pressure, reactive chemicals, and potential for vessel failure.
Methodology:
- Preparation: Set up the microwave reactor in a fume hood. Wear required PPE. Prepare reagents and select a manufacturer-certified vessel. For a new reaction, start with small amounts of reagents.
- Loading: Transfer the reaction mixture to the vessel, ensuring it is not overfilled. Assemble the vessel according to the manufacturer's instructions, ensuring venting mechanisms are operational.
- Parameter Setting: Input the reaction parameters (temperature, pressure limit, time, and stirring speed) into the microwave system. Always set limits below the maximum rating of the vessel.
- Initiating Reaction: Close the microwave door securely. Start the reaction. Do not leave the reactor unattended, especially during the first run or when using a different unit, as materials can react unexpectedly [27].
- Post-Reaction: Once the cycle is complete and the system has cooled to a safe temperature, open the door carefully. Use thermal gloves to remove the vessel, remembering that it may be very hot. Open the vessel slowly in the fume hood to release any residual pressure.
- Clean-up: Clean all equipment and the microwave cavity immediately after use to prevent contamination and corrosion [36].
The Scientist's Toolkit
Table 1: Essential Research Reagent Solutions and Safety Equipment
| Item | Function & Safety Relevance |
|---|---|
| Laboratory-Grade Microwave Reactor | A dedicated system with a reinforced stainless steel cavity, real-time pressure/temperature monitoring, and automatic safety controls. It is designed to contain vessel failures. |
| Manufacturer-Certified Vessels | Reaction tubes designed and tested for use in specific microwave cavities. Using non-certified vessels risks failure. They often include built-in pressure-release mechanisms [12]. |
| Stir Bars | Prevents localized superheating by ensuring even heat distribution throughout the sample, which is critical for maintaining controlled reaction conditions [12]. |
| Personal Protective Equipment (PPE) | Minimum: Lab coat, indirectly vented chemical splash goggles, and vinyl/nitrile gloves. Heat-resistant gloves and a face shield are needed for handling hot items [36]. |
| Ionic Liquids/Solvents | Many ionic liquids absorb microwave radiation effectively and facilitate rapid energy transfer through ionic conduction, allowing for efficient heating [37]. |
Safety Systems Workflow
The diagram below illustrates the logical relationship and workflow between the three essential safety features and the operator's actions in a microwave reactor.
Troubleshooting Guides
Goggle Fogging and Impairment
Problem: Goggles fog up during use, impairing vision.
- Potential Cause: Inadequate ventilation or improper cleaning.
- Solution: Select goggles with anti-fog coatings or built-in venting [38]. Clean goggles with mild, soapy water and air-dry; avoid abrasive cleaners or paper towels that can damage lenses [39].
Problem: Goggles are scratched or damaged.
- Potential Cause: Improper cleaning, storage, or general wear and tear.
- Solution: Inspect goggles before each use. Replace scratched or damaged eyewear immediately, as it can impair vision and reduce protection [39].
Glove Failure and Inadequacy
Problem: Glove tears or punctures during use.
- Potential Cause: Mechanical damage, improper sizing, or using a glove material incompatible with the chemical or task.
- Solution: Always inspect gloves for pinholes or tears before use [39]. Consult manufacturer chemical compatibility charts [40]. For tasks requiring high dexterity with chemical hazards, consider thinner-gauge nitrile gloves [41].
Problem: Chemical permeation through gloves.
- Potential Cause: Incorrect glove material selection or exceeding the glove's breakthrough time.
- Solution: Nitrile gloves generally offer better barrier efficacy than latex or vinyl [42]. For prolonged contact or highly toxic chemicals, double-gloving with nitrile over a Silver Shield glove may be necessary [40].
Lab Coat Contamination and Fit
Problem: Lab coat is contaminated with hazardous materials.
- Potential Cause: Splash or spill during an experiment.
- Solution: Decontaminate or launder lab coats regularly. For heavy contamination with highly hazardous materials, dispose of the coat as hazardous waste [39].
Problem: Lab coat restricts movement or is a trip hazard.
- Potential Cause: Improper fit—too tight or too long.
- Solution: Select a lab coat that allows for freedom of movement without being excessively long. Look for designs with side vents for easy access to pants pockets [43].
Frequently Asked Questions (FAQs)
Q1: What type of goggles are required for microwave-assisted chemical reactions? A: For chemical reactions, including those in microwaves, indirectly vented chemical splash goggles are the minimum requirement [44]. These goggles protect against splashes while preventing liquids from entering through the vents. Safety glasses are not sufficient for chemical splash hazards [40].
Q2: Why are nitrile gloves preferred over latex or vinyl in the lab? A: Nitrile gloves are preferred because they provide a better chemical barrier, as shown in a CDC study where nitrile had a significantly lower failure rate (2.38%) compared to latex (19.4%) and vinyl (27.1%) [42]. Additionally, latex proteins can cause allergic reactions in some individuals [40].
Q3: How often should I clean my lab coat and goggles? A: Lab coats should be laundered weekly with regular use around hazardous materials, or monthly for less frequent use [39]. Goggles should be cleaned after each use, especially if shared, using mild soap and water or isopropanol for disinfection [39].
Q4: What are the key features to look for when selecting a lab coat for microwave chemistry? A: Select a flame-resistant, chemical-resistant lab coat that meets the NFPA 2112 standard [43]. It should have a proper fit (not too long or tight), snap-on buttons for quick removal, and be made of a high-quality fabric like cotton, which will not melt like synthetic fibers [43].
Q5: Can I use the same microwave for heating chemicals and food? A: No. A microwave used in a lab must be dedicated to laboratory purposes only and clearly labeled "For Laboratory Use Only—Not for Food" to prevent cross-contamination [44].
Data Presentation
Glove Material Failure Rates
The table below summarizes quantitative data on glove barrier performance from a CDC study, showing failure rates for different materials when challenged with a fluorescein solution [42].
Table: Glove Material Barrier Failure Rates
| Glove Material | Failure Rate | Key Observation |
|---|---|---|
| Nitrile | 2.38% (1/42 samples) | Provided the best barrier efficacy. |
| Latex | 19.4% (7/36 samples) | Failure rate increased 2.5 times when stretched. |
| Vinyl | 27.1% (13/48 samples) | Showed the highest failure rate. |
Chemical Splash Goggle Specifications
The table below outlines key specifications and options for chemical splash goggles to guide selection [38].
Table: Chemical Splash Goggle Specifications
| Feature | Specifications & Options | Relevant Standard Examples |
|---|---|---|
| Material | Soft vinyl with a double flange cushion for comfort and fit. | - |
| Lens | 2 mm thick, clear, durable polycarbonate. | - |
| Venting | Available in vented and non-vented models. | - |
| Lens Coating | Available with or without fog-free coating. | - |
| Standards | Meets various ANSI Z87+ standards for impact and chemical splash protection. | Z87+ D3; Z87+ D3, D4, D5 |
Experimental Protocols
Protocol: PPE Inspection and Maintenance
Objective: To ensure all PPE is in a safe and serviceable condition before use. Methodology:
- Goggles/Face Protection: Visually inspect for scratches, cracks, or damage to the lens or strap. Check shared eyewear before each use [39].
- Gloves:
- Lab Coats: Check for tears, degraded fabric, chemical saturation, or damaged snaps/buttons. Arrange for repair or replacement as needed [39].
Protocol: PPE Donning and Doffing Sequence
Objective: To safely put on (don) and remove (doff) PPE to minimize cross-contamination. Methodology:
- Donning Sequence: Lab Coat → Safety Goggles → Gloves [40].
- Doffing Sequence:
- Remove gloves first using proper technique (e.g., peeling off from the wrist, turning inside out) to avoid skin contamination [39].
- Remove lab coat by unfastening snaps and shrugging off, avoiding contact with the outer surface.
- Remove goggles by handling the headband.
- Wash hands thoroughly after removing all PPE [40].
Workflow and Pathway Diagrams
Diagram: PPE Selection and Use Workflow
The Scientist's Toolkit
Table: Essential Research Reagent Solutions & Materials for Microwave Chemistry Safety
| Item | Function / Purpose |
|---|---|
| Indirectly Vented Chemical Splash Goggles | Provides primary eye protection against chemical splashes and vapors while reducing fogging [44]. |
| Flame-Resistant (FR) Lab Coat | Protects skin and personal clothing from chemical splashes, spills, and potential flash fires from flammable solvents [43]. |
| Nitrile Gloves | Provides a protective barrier for hands against incidental chemical exposure; offers superior chemical resistance compared to latex or vinyl [42] [40]. |
| Microwave-Safe Glassware | Prevents breakage and reaction vessel failure under heat and pressure; must not contain metal or be cracked [44]. |
| Secondary Containment Tray | Catches spills or breakages within the microwave, preventing contamination of the equipment and work surface [44]. |
| Class ABC Fire Extinguisher | Readily available to extinguish fires involving electrical equipment, flammable liquids, and ordinary combustibles [44]. |
Developing and Following Written Standard Operating Procedures (SOPs)
Frequently Asked Questions (FAQs)
Q1: Why is a dedicated laboratory-use microwave required? Why can't we use a kitchen-grade appliance? Using a domestic microwave oven for chemical reactions is prohibited. These appliances lack the necessary safety controls for laboratory work, such as power, temperature, or pressure monitoring. Their interiors can be corroded by acids and solvents, and they are not designed to withstand the explosive force of a vessel failure. Laboratory-grade systems feature reinforced, corrosion-resistant cavities and safety interlocks to contain failures. [45] [12]
Q2: What are the critical points to include in a microwave SOP for chemical reactions? A robust SOP must cover several critical areas [45]:
- Purpose and Scope: Define the specific procedures and reactions the SOP applies to.
- Hazard Identification: List all chemical hazards (e.g., flammability, toxicity) and physical hazards (e.g., pressure, temperature).
- Personal Protective Equipment (PPE): Mandate at a minimum chemical splash goggles, a lab coat, and appropriate gloves (e.g., nitrile). [45]
- Operational Parameters: Specify approved container types, maximum fill volumes (no more than two-thirds full is recommended), and power/time settings. [27]
- Emergency Procedures: Outline steps for dealing with spills, fire, or vessel failure.
Q3: Which solvents or reagents require special caution in microwave-assisted synthesis? Chemists must be aware of reagent stability at high temperatures. Key hazards include [12]:
- Flammable solvents: Should not be heated unless using an explosion-proof laboratory-grade microwave. [45]
- Compounds with azide or nitro groups: These have known potential to cause explosions under thermal heat.
- Exothermic reactions: The fast energy transfer of microwave irradiation can cause pressure and heat to build at an alarmingly fast rate, potentially exceeding the vessel's safety limits.
Q4: How should microwave reaction vessels be prepared to prevent dangerous pressure buildup? Sealed vessels present a significant explosion risk. Always provide a means for pressure relief [45] [46]. This can be achieved by using loose caps or placing a watch glass over containers to allow vapors to vent safely during heating.
Q5: What routine inspections should be performed on the microwave system? Users should perform these checks regularly [45] [27]:
- Before each use: Visually inspect the door, seals, and exterior for damage. Never operate a unit with damaged seals or hinges. [45]
- Electrical safety: Ensure the unit is plugged directly into a GFI-protected wall outlet; the use of extension cords is prohibited. [45] [27]
- After a vessel failure: Follow manufacturer protocols to clean the cavity and inspect for damage before returning the unit to service. [12]
Troubleshooting Guides
Problem 1: Arcing or Sparks Inside the Microwave Cavity
- Potential Cause 1: Presence of metal in the cavity.
- Potential Cause 2: Metallic residues or coatings.
- Solution: Clean the cavity thoroughly. In solvent-free reactions or when using metal catalysts, a metallic coating can form on the vessel wall. Ensure adequate stirring to prevent this and inspect vessels for residue. [12]
Problem 2: Unusual Pressure Buildup or Vessel Failure
- Potential Cause 1: The reaction vessel was sealed or improperly vented.
- Solution: Always follow the SOP for vessel preparation, ensuring adequate venting. Do not use sealed containers. [45]
- Potential Cause 2: The reaction kinetics were misjudged, leading to a runaway exothermic reaction.
- Solution: Always start with small amounts of reagents and lower power levels when testing new reactions. Consult the chemical's MSDS for stability and reactivity data at high temperatures. [12]
Problem 3: Melting or Deformation of Reaction Vessels
- Potential Cause 1: Use of non-microwave-safe containers.
- Potential Cause 2: Localized superheating.
- Solution: This can occur in viscous samples or solvent-free reactions without proper mixing. Ensure adequate stirring by using an appropriate stir bar or mixer. [12]
Problem 4: Inconsistent or Unreproducible Reaction Results
- Potential Cause: Inaccurate power or temperature control.
- Solution: Use a laboratory-grade microwave instrument that provides precise control and monitoring of power and temperature. Ensure the SOP defines these parameters clearly. [12]
The table below summarizes the core safety requirements for operating a microwave in a chemical laboratory.
| Protocol Category | Key Requirements |
|---|---|
| Equipment & Placement | Dedicated laboratory-grade unit only [45] [12]. Must be plugged into a GFI wall outlet (no extension cords) [45] [27]. Located in a well-ventilated area, away from flammables. [45] |
| Personal Protective Equipment (PPE) | Indirectly vented chemical splash goggles, lab coat, and heat-resistant/chemical-resistant gloves. A face shield is advised when heating large quantities. [45] [27] |
| Chemical Handling | Do not heat flammable solvents in non-explosion-proof ovens [45]. Be aware of exothermic reactions and unstable functional groups (e.g., azides) [12]. |
| Vessel Selection & Prep | Use only microwave-safe, non-metal containers. Do not seal vessels; provide venting. Do not fill containers more than 2/3 full. [45] [46] [27] |
| Training & Documentation | Users must be trained on the specific SOP. Written Standard Operating Procedures must be available and followed. [45] |
The Scientist's Toolkit: Key Research Reagent Solutions
The table below lists essential materials and their functions for safe microwave-assisted chemistry.
| Item | Function / Explanation |
|---|---|
| Certified Microwave Reaction Vessels | Pressure-rated containers designed by the instrument manufacturer to withstand high temperatures and pressures, preventing failures. [12] |
| Microwave Synthesis Instrument | A purpose-built laboratory system with reinforced cavities, safety interlocks, and precise control of temperature, pressure, and power. [12] |
| Secondary Containment Tray | A tray placed under the reaction vessel to catch spills, preventing contamination of the microwave cavity. [45] |
| Material Safety Data Sheet (MSDS) | Provides critical data on chemical stability and reactivity at high temperatures, essential for risk assessment before starting a reaction. [12] |
| Stir Bar or Mixing System | Ensures proper mixing of the reaction mixture to prevent localized superheating and ensure reproducible results. [12] |
Experimental Workflow and Safety Decision Diagram
The following diagram illustrates the logical workflow for planning and safely executing a microwave-assisted chemical reaction, incorporating key safety checks.
Troubleshooting Guides
Microwave Synthesis Troubleshooting
| Problem Symptom | Possible Cause | Solution | Preventive Measures |
|---|---|---|---|
| Reaction vessel failure, rupture, or leakage. | Exceeding pressure/temperature ratings of vessel; using non-certified containers; using metal containers; extended vessel lifecycle [46] [12]. | Immediately halt the run; contain spill in ventilated cavity; carefully decontaminate [12]. | Use only manufacturer-certified pressure tubes; inspect vessels regularly; do not exceed recommended load limits [46] [12]. |
| Uncontrolled reaction (violent boiling, pressure surge). | Highly exothermic reaction kinetics; solvent instability at high temperatures; excessive microwave power [12]. | Implement automatic safety controls (power cycling, cooling); start with small reagent amounts and low power [12]. | Study reaction kinetics and solvent stability (consult MSDS Section 10); avoid overly high power or temperature settings [46] [12]. |
| Low reaction yield or no reaction. | Inefficient microwave coupling; use of non-polar solvents; incorrect power/time parameters [37] [47]. | Add a polar solvent or use a passive heating element; switch to a microwave-absorbing solvent (e.g., water, ionic liquids); optimize power setting [37] [47]. | Ensure reagents or solvent are polar (e.g., water, methanol, DMF) for effective dielectric heating [37] [47]. |
| Arcing (sparks inside cavity). | Presence of ungrounded metal components (filings, foils); use of metal containers [12]. | Stop the instrument immediately; remove metal particulates. | Use only non-metal containers; avoid metal catalysts in ungrounded, particulate form [46] [12]. |
| Inconsistent results between runs. | Poor temperature control; inadequate stirring; non-uniform energy distribution in multi-mode ovens [12] [37]. | Use dedicated lab microwave with temperature monitoring and magnetic stirring; ensure consistent reagent preparation [46] [12]. | Use a dedicated laboratory microwave synthesizer with precise temperature and power control [12]. |
Microwave Digestion Troubleshooting
| Problem Symptom | Possible Cause | Solution | Preventive Measures |
|---|---|---|---|
| Incomplete digestion (undissolved sample). | Insufficient digestion time or power; inadequate acid mixture; sample mass too large [48]. | Optimize method with longer hold time or stepped temperature program; use efficient acid mixtures (e.g., HF for silicates); reduce sample size [48]. | Refer to application-specific methods (e.g., UOP Methods for petroleum); use Single Reaction Chamber (SRC) technology for challenging samples [48]. |
| High and variable blank levels. | Contamination from reagents or unclean vessels; vapor cross-contamination between vessels [48]. | Use high-purity acids; implement automated reagent dosing (e.g., easyFILL); perform thorough vessel cleaning [48]. | Use ultra-pure reagents; employ an automated dosing system for precision and to reduce human error [48]. |
| Poor recovery of trace elements. | Loss of volatile analytes; adsorption to vessel walls; incomplete digestion [48]. | Use closed-vessel digestion; optimize temperature/pressure; include pre- and post-digestion rinses with dilute acid [48]. | Use closed-vessel systems; validate methods with certified reference materials (CRMs) [48]. |
| Vessel damage or corrosion. | Use of highly corrosive acids (e.g., HCl, HF); exceeding operational limits; improper cleaning [46]. | Follow manufacturer's cleaning guidelines; use pressure relief mechanisms; regularly inspect and replace vessels [46]. | Use vessels designed for specific acid mixtures; implement regular maintenance and calibration schedules [46]. |
Frequently Asked Questions (FAQs)
General Safety & Protocol
Q1: What is the most critical safety feature in a microwave chemistry laboratory? A1: The most critical safety feature is a trained and knowledgeable operator [12]. Proper training ensures understanding of reaction kinetics, equipment limitations, and safe operational procedures, which is more important than any single hardware feature.
Q2: Can I use a domestic microwave oven from an appliance store for chemical synthesis? A2: No. Domestic ovens lack essential safety controls, corrosion-resistant cavities, and containment features for vessel failures. Using them poses severe risks of explosion, corrosion, and exposure to radiation and toxic fumes [12]. Always use instrumentation specifically designed for laboratory use.
Q3: Why must metal containers never be used? A3: Metal reflects microwave radiation, which can cause arcing (sparks), damage the instrument, and potentially ignite flammable vapors. This can lead to fire or explosion hazards [46] [12].
Q4: How does microwave-assisted synthesis align with Green Chemistry principles? A4: It aligns by reducing reaction times (from hours to minutes), lowering energy consumption, enabling solvent-free conditions or use of safer solvents like water, minimizing waste, and improving atom economy [37] [47].
Synthesis-Specific
Q5: Which reactions are particularly risky under microwave irradiation? A5: Reactions involving azide or nitro groups (known explosion risks), highly exothermic reactions, and chemistries with solvents or reagents that decompose into hazardous components at high temperatures [12].
Q6: Can I use metal catalysts in microwave-assisted synthesis? A6: Yes, small amounts of grounded metal catalysts are commonly used and generally do not cause arcing. However, you must avoid metal filings and other ungrounded metals [12].
Q7: What causes localized superheating, and how can I prevent it? A7: Localized superheating occurs in viscous samples or solvent-free reactions without adequate stirring, or from metallic coatings on vessel walls. Prevent it by ensuring adequate stirring with a heavy stir bar or mixer [12].
Digestion & Extraction
Q8: What technology can help with challenging samples like rocks or polymers? A8: Single Reaction Chamber (SRC) technology is designed to handle difficult-to-digest samples, including silicate-rich rocks, refractory materials, and polymer composites, ensuring complete digestion and accurate elemental analysis [48].
Q9: How can I improve precision and safety when adding acids to hundreds of samples? A9: Implement an automated reagent dosing system (e.g., easyFILL). This enhances safety by reducing operator exposure to acids, improves precision, and minimizes human error [48].
Experimental Protocols
General Workflow for a Safe Microwave-Assisted Reaction
The diagram below outlines the critical decision points for safely planning and executing a microwave-assisted chemical reaction.
Protocol: Solvent-Free Aldol Condensation (Green Synthesis)
Objective: To demonstrate a rapid, solvent-free microwave-assisted reaction, aligning with green chemistry principles by reducing waste and energy consumption [37].
Materials: The Scientist's Toolkit table below lists the essential materials.
| Research Reagent/Material | Function & Explanation |
|---|---|
| Aldehyde (e.g., 4-nitrobenzaldehyde) | Electrophile. The carbonyl component that undergoes nucleophilic addition. |
| Ketone (e.g., acetophenone) | Nucleophile. The methylene component that forms an enolate. |
| Boric Acid (or another solid acid) | Catalyst. A green, mild solid acid that facilitates enolization and condensation without requiring strong bases or solvents [37]. |
| Mortar and Pestle | Mixing. Used to grind solid reagents together intimately, ensuring efficient reaction in the absence of solvent. |
| Certified Microwave Reaction Vial | Reaction Vessel. A sealed, microwave-transparent container that can withstand the temperature and pressure of the reaction [46]. |
Step-by-Step Procedure:
- Preparation: In a mortar, thoroughly grind aldehyde (1.0 mmol), ketone (1.2 mmol), and boric acid catalyst (10 mol%) into a fine, homogeneous powder [37].
- Loading: Transfer the mixed powder into a certified microwave reaction vial. Seal the vial according to the manufacturer's instructions [46].
- Parameter Setup: Place the vial in the microwave reactor. Set the conditions, for example: Power: 150 W; Temperature: 100 °C; Time: 5-10 minutes; Stirring: Enabled [37].
- Execution: Start the reaction. Monitor temperature and pressure remotely.
- Work-up: After completion and cooling, purify the crude product. Solvent-free reactions often yield high-purity products that may only require simple washing or recrystallization [37].
Protocol: Closed-Vessel Microwave Digestion of Soil Samples
Objective: To completely digest a soil sample for subsequent trace metal analysis by ICP-MS, ensuring accurate results and high sample throughput [48].
Materials:
- Soil sample (homogenized and dried, ~0.2 g)
- Certified Reference Material (CRM) for quality control
- Digestion acids: Nitric acid (HNO₃, conc.), Hydrochloric acid (HCl, conc.)
- Automated dosing system (e.g., easyFILL) or precision pipettes
- Certified digestion vessels (e.g., for SRC or rotor-based systems)
- Laboratory microwave digestion system
Step-by-Step Procedure:
- Weighing: Precisely weigh about 0.2 g of soil sample and transfer it into a clean digestion vessel. Include a vessel with a CRM and a blank vessel.
- Acid Addition: Using an automated dispenser or fume hood pipettes, add 6 mL of HNO₃ and 2 mL of HCl to each vessel [48].
- Sealing: Securely close the vessels according to the manufacturer's protocol.
- Method Programming: Load the vessels into the microwave. Program a stepped temperature method, for example:
- Ramp 1: to 120 °C in 10 min, hold for 5 min.
- Ramp 2: to 180 °C in 10 min, hold for 15 min [48].
- Run & Cool: Start the digestion program. After completion, allow the system to cool to room temperature before opening.
- Dilution & Analysis: Carefully open vessels in a fume hood. Transfer the digestate to volumetric flasks, make to volume with deionized water, and analyze by ICP-MS [48].
The Scientist's Toolkit: Essential Materials
This table details key reagents and materials crucial for successful and safe microwave-assisted chemistry.
| Item Name | Function & Safety Context |
|---|---|
| Certified Pressure Vessels & Tubes | Containment. Designed to withstand high T/P; essential for preventing catastrophic vessel failure. Using non-certified vessels is a major safety risk [46] [12]. |
| Polar Solvents (Water, DMF, EtOH) | Efficient Microwave Coupling. Possess a permanent dipole moment, enabling efficient absorption of microwave energy via dipolar polarization, leading to rapid heating [37] [47]. |
| Ionic Liquids | Green Solvents & Heating Media. Excellent microwave absorbers via ionic conduction mechanism; often used as green, non-volatile solvents and catalysts [37]. |
| Magnetic Stir Bar (Heavy-duty) | Homogeneous Heating. Prevents localized superheating and hot spots by ensuring efficient mixing within the pressurized reaction vessel [12]. |
| Automated Reagent Dosing System | Safety & Precision. Enhances operator safety by minimizing exposure to corrosive acids during digestion protocols and improves reproducibility [48]. |
| Material Safety Data Sheet (MSDS) | Hazard Identification. Critical reference document (especially Section 10) for assessing chemical stability and reactivity at high temperatures before starting a reaction [12]. |
Troubleshooting Guides
Guide 1: My reaction vessel failed during a microwave-assisted experiment. What went wrong?
Reaction vessel failures in microwave systems can be dangerous and are typically caused by exceeding the vessel's physical limits or using improper equipment [12].
- Problem: Vessel failure, explosion, or rupture during microwave experiment.
- Primary Cause: Using non-certified vessels, exceeding pressure/temperature ratings, or using vessels beyond their serviceable lifetime [12].
- Immediate Action: Stop the reaction, ensure the microwave door remains closed to contain any release, and allow the system to cool completely before addressing the cleanup [12].
- Solution: Always use manufacturer-certified pressure vessels designed for microwave synthesis. Never exceed the pressure and temperature limits specified for the vessel. Develop familiarity with reaction kinetics to prevent runaway exothermic reactions [12].
Guide 2: I see sparks inside the microwave cavity when running my experiment.
Sparks (arcing) inside a microwave are a significant fire hazard and indicate the presence of metal or a conductive material that should not be there [49].
- Problem: Visible sparking or arcing during operation.
- Primary Cause: Introduction of metal objects (utensils, foil, metal-containing containers) or using vessels with metallic components (e.g., metal seals). Damaged waveguide covers or chipped interior coatings can also cause arcing [49].
- Immediate Action: Immediately stop the microwave and unplug it. Inspect the cavity for metal objects, grease buildup, or damage [49].
- Solution: Remove all metal objects. Use only microwave-safe glassware without metallic accents or trim. Clean the cavity thoroughly to remove any carbonized food or chemical residues. Inspect the waveguide cover (a protective mica or plastic sheet) for damage and replace it if burnt or cracked [49].
Guide 3: I need to heat a solvent in a microwave for a chemical reaction. What container should I use?
The choice of container is critical for safety and reaction success. The core principle is to avoid metal and ensure proper venting [50].
- Problem: Selecting a safe container for microwave-assisted chemical reactions.
- Primary Cause: Using sealed vessels or metal containers, which can lead to pressure buildup and explosions [50].
- Immediate Action: Do not proceed until you have confirmed the container is safe.
- Solution:
- Material: Use dedicated microwave-safe laboratory glassware (e.g., Pyrex). Never use metal containers, foil, or containers with metallic components [50].
- Closure: Never heat solvents in a fully sealed container. Always provide venting by using a loose cap, a watch glass, or specialized venting caps to prevent dangerous pressure accumulation [50].
- Type: For laboratory work, use only reaction vessels certified by the microwave system manufacturer for this specific purpose [12].
Frequently Asked Questions (FAQs)
What is the main danger of using a metal container in a microwave?
Metal reflects microwave energy, which can cause intense arcing (sparks) that may damage the microwave oven, ignite flammable solvent vapors, or start a fire. This poses a severe explosion and fire risk [49] [50].
Why can't I use a sealed container to heat solvents?
Heating solvents in a sealed container is extremely dangerous. As the solvent heats up, it vaporizes, dramatically increasing the pressure inside the container. This can cause the vessel to rupture explosively, leading to a violent release of hot chemicals and glass shards [50].
Are there any solvents that should never be heated in a microwave?
Yes. Do not heat flammable liquids unless you are using an explosion-proof, laboratory-grade microwave system, which is rare. Additionally, treat solvents with functional groups known to be thermally unstable (e.g., azides, nitro groups) with extreme caution, as they can decompose explosively under microwave irradiation [12] [50].
What are the key differences between a kitchen microwave and one used for laboratory synthesis?
Laboratory microwave systems are engineered with safety as a primary concern. They feature reinforced stainless-steel cavities and doors to contain explosions, direct venting for vapors, and sophisticated controls to monitor and regulate temperature and pressure. Kitchen microwaves lack these critical safety features and should never be used for chemical experiments [12].
What personal protective equipment (PPE) is required when working with solvents in a microwave?
At a minimum, you must wear indirectly vented chemical splash goggles, a lab coat, and appropriate solvent-resistant gloves (e.g., nitrile). Always perform these operations in a well-ventilated area, ideally within a chemical fume hood [50].
Research Reagent Solutions: Essential Materials for Microwave Chemistry
The table below details key materials required for the safe and effective use of solvents in microwave-assisted reactions.
| Item | Function & Rationale |
|---|---|
| Type I Safety Can | Safe storage and dispensing of flammable liquids. Features a sealed, self-closing lid and a built-in flame arrestor to prevent flashback ignition [51]. |
| Certified Microwave Vessels | Reaction containers specifically designed and tested to withstand the pressure and temperature of microwave synthesis. Using non-certified vessels risks catastrophic failure [12]. |
| Solvent-Resistant Gloves (Nitrile) | Protects hands from absorption of hazardous solvents and chemical burns. Material is chosen for its compatibility with a wide range of organic solvents [52]. |
| Chemical Fume Hood | Provides vital ventilation to prevent the buildup of toxic or flammable solvent vapors in the laboratory atmosphere, protecting the researcher from inhalation and reducing fire risk [53] [50]. |
| Indirectly Vented Goggles | Protects eyes from chemical splashes without direct vents that could allow liquids or vapors to enter from the sides [50]. |
| Flammable Storage Cabinet | A specially constructed, fire-resistant cabinet for storing flammable liquids. Its use is often required by fire codes when quantities exceed a certain threshold and it doubles the allowable storage limit in a laboratory [53] [54]. |
| Lab-Safe Refrigerator | A spark-free appliance for safely storing flammable chemicals that require refrigeration. Standard household refrigerators have internal ignition sources that can cause an explosion [53]. |
Experimental Protocol: Safe Solvent Handling for Microwave Reactions
This protocol outlines the critical steps for safely preparing and running a microwave-assisted chemical reaction with solvents.
1. Pre-Experimental Planning - Hazard Assessment: Consult the Safety Data Sheets (SDS) for all chemicals, focusing on Sections 9 (physical properties) and 10 (stability and reactivity). Note the flash point of the solvent [53] [52]. - SOP: Adhere to the laboratory's written Standard Operating Procedures (SOPs) for microwave use [50].
2. Preparation and Setup - PPE: Don indirectly vented chemical splash goggles, a flame-resistant lab coat (or 100% cotton), and solvent-resistant gloves [53] [50]. - Workspace: Work in a chemical fume hood to ensure adequate ventilation. Ensure the area is free of all ignition sources (e.g., hot plates, open flames) [53]. - Container Selection: Select a manufacturer-certified microwave vessel. Never use metal or sealed containers. Ensure the closure mechanism allows for safe venting of pressure [12] [50]. - Solvent Transfer: If transferring from a large container (>4 L), use bonding and grounding wires between metal containers to prevent static electricity buildup, which can generate sparks [53].
3. Execution and Post-Reaction - Instrument Check: Inspect the microwave cavity and door seal for any damage before starting [50]. - Reaction Scale: When trying a new reaction, start with small amounts of reagents at a lower power setting to understand the reaction kinetics and avoid runaway exothermic events [12]. - Cleaning: Clean up any spills immediately using non-flammable absorbent materials. Dispose of solvent waste in designated, properly labeled containers [53] [52].
Solvent Safety and Classification Data
Understanding solvent properties is fundamental to risk assessment. The following tables summarize key classification systems and exposure risks.
| Class | Flash Point | Boiling Point | Examples |
|---|---|---|---|
| IA | < 73°F (22.8°C) | < 100°F (37.8°C) | Diethyl ether, n-Pentane |
| IB | < 73°F (22.8°C) | ≥ 100°F (37.8°C) | Acetone, Ethanol, Isopropyl Alcohol |
| IC | ≥ 73°F and < 100°F | - | Xylenes, Turpentine |
| Type of Exposure | Potential Health Effects |
|---|---|
| Short-Term (Acute) | Dizziness, headaches, nausea, eye/skin irritation, drowsiness. |
| Long-Term (Chronic) | Nervous system damage, memory loss, liver/kidney injury, reproductive effects, cancer (e.g., from benzene). |
Workflow: Solvent and Container Safety
The diagram below illustrates the logical decision-making process for the safe use of solvents and containers in microwave-assisted reactions.
Preventing and Managing Incidents: Troubleshooting Common Problems
Frequently Asked Questions
Q1: Why is the regular inspection of door seals, hinges, and latches critical for microwave safety in a chemical research lab? In a laboratory context, microwaves are used to heat chemicals and biological samples, which can create pressure buildup or release corrosive fumes. A faulty door seal can allow harmful radiation to leak or potentially allow chemical vapors to escape into the lab environment, posing a health risk. Regular inspection is a key part of the safety protocol to prevent these hazards [55].
Q2: What is the most common indicator that a microwave door seal needs to be replaced? Visible damage is the most common indicator. You should look for signs that the seal is cracked, torn, warped, or missing. Furthermore, if you notice that the door is not closing flush against the frame or if you feel a draft around the door, it strongly suggests the seal is compromised and needs replacement [56].
Q3: How can I troubleshoot a microwave door that won't latch or close properly? This problem is often due to misalignment. Check if the door is meeting the frame evenly on all sides. If it is hitting the top or bottom first, the door or its strike plate may need realignment. Additionally, inspect the hinges for looseness or damage, as these can also prevent proper latching [56] [57].
Q4: A lab microwave door is not sealing properly. What are the immediate actions a researcher should take? The immediate action is to cease all use of the microwave. Do not operate it until the issue is resolved. Place a clear "Out of Order - Do Not Use" sign on the unit and report the problem to the appropriate lab manager or safety officer for professional repair or replacement [55].
Q5: What routine maintenance can be performed on door hinges to ensure longevity? Regular lubrication is key to maintaining hinges and preventing squeaks. Use a suitable lubricant like lithium grease, silicone spray, or graphite on the hinge pins and the tops of the pin slots. Always wipe away any excess lubricant. If a hinge is too old, rusty, or damaged, it should be replaced entirely [57].
Troubleshooting Guide
The following tables outline common issues and solutions for microwave door components.
Table 1: Troubleshooting Door Seals and Weatherstripping
| Identify Issue | Recommendations |
|---|---|
| The weatherstrip is missing, painted over, cracked, torn, or otherwise damaged [56]. | Replace the weatherstrip. Do not operate the microwave with a damaged seal [55]. |
| A draft is detectable, or the door is not closing flush against the frame, indicating a broken seal [56] [57]. | Replace the weatherstripping to re-establish a proper seal and prevent air or vapor leakage [57]. |
| The door is loose in the frame, with excessive in-and-out movement when latched [56]. | Adjust the strike plate for a tighter fit and check the hinges for wear. |
Table 2: Troubleshooting Hinges and Latches
| Identify Issue | Recommendations |
|---|---|
| The door is sagging, is out of square in the frame, or won't stay latched [56] [57]. | Ensure the long hinge screws are properly installed and tightened. Retightening the upper hinge can often realign the latch with the strike plate [57]. |
| The door is not meeting the frame evenly when it closes (e.g., hitting the top or bottom first) [56]. | Realign, reshim, or readjust the latch-side jamb so the door meets the weatherstrip evenly from top to bottom. |
| The hinges are squeaky or stiff [57]. | Lubricate the hinge pins and pin slots with an appropriate lubricant (e.g., lithium grease, silicone spray). Wipe away excess. |
| The strike plate is misaligned with the latch [57]. | Reposition the strike plate to align with the door's current position so the latch can fully engage. |
Experimental Protocol: Visual and Functional Inspection of Microwave Doors
1.0 Purpose To define a standard methodology for the routine visual and functional inspection of microwave oven doors in a chemical research laboratory, ensuring operational safety and preventing exposure to radiation or chemical vapors.
2.0 Scope This protocol applies to all microwaves used for laboratory purposes, including those for chemical digestion, sample heating, and melting agar.
3.0 Materials
- Personal Protective Equipment (PPE): Lab coat, vinyl or nitrile gloves, and safety goggles [55]
- Isopropyl Alcohol (70%) and lint-free wipes
- Flashlight
- Mirror (for inspecting seal integrity)
4.0 Pre-Inspection Safety
- Confirm the microwave is unplugged and has cooled to room temperature.
- Wear appropriate PPE.
5.0 Procedure 5.1 Door Seal (Gasket) Inspection 1. Visual Check: Using a flashlight, carefully examine the entire door seal for any visible signs of damage, including cracks, tears, warping, or carbonized residue from chemical spills [55] [56]. 2. Cleanliness Check: Wipe the seal with a lint-free cloth dampened with 70% isopropyl alcohol to remove any debris or spill residue that could prevent a tight seal [55]. 3. Physical Integrity Check: Run your finger along the seal to feel for any brittleness or areas that have lost their flexibility.
5.2 Hinge Inspection 1. Operational Check: Slowly open and close the door, feeling for any binding, stiffness, or unusual resistance. 2. Visual and Mechanical Check: Inspect the hinges for visible corrosion or damage. Check that all hinge screws are present and tight [57]. 3. Lubrication (if applicable): If hinges are squeaky or stiff, apply a small amount of appropriate lubricant (e.g., silicone spray) to the hinge pins, wiping away any excess [57].
5.3 Latch and Closure Mechanism Inspection 1. Alignment Check: Visually check that the door sits evenly within its frame without gaps when closed [56]. 2. Functional Check: Close the door and listen for a solid "click" indicating full engagement. Gently try to pull the door open without disengaging the latch to test its security [56]. 3. Strike Plate Check: Ensure the strike plate is securely fastened and properly aligned with the door latch [57].
5.4 Post-Inspection Actions 1. Pass: If no issues are found, document the inspection and return the microwave to service. 2. Fail: If any damage, misalignment, or functional failure is detected, affix a "DO NOT USE - AWAITING REPAIR" tag to the microwave. Report the finding to the lab manager immediately. The microwave must not be used until qualified personnel have performed repairs [55].
The Scientist's Toolkit: Essential Research Reagent Solutions
Table 3: Key Materials for Microwave Door Maintenance and Cleaning
| Item | Function / Explanation |
|---|---|
| Lint-free Wipes | For cleaning door seals and surfaces without leaving fibers or residue that could interfere with the seal. |
| Isopropyl Alcohol (70%) | An effective and fast-evaporating solvent for decontaminating and cleaning door seals and interior surfaces of chemical or biological residues [55]. |
| Silicone-based Lubricant | Used to maintain hinge mechanism functionality; it is generally stable and less likely to degrade components than other oil-based lubricants [57]. |
| Replacement Door Seals | Laboratory should have a known supplier or procedure for obtaining manufacturer-approved replacement seals to ensure proper fit and safety. |
| Replacement Hinges and Screws | Having spare hardware specific to the microwave models in use allows for prompt repair of mechanical failures. |
Microwave Door Inspection Workflow
FAQs: Immediate Response and System Integrity
Q1: What is the first thing I should do if a vessel fails inside the microwave system? Do not open the microwave door immediately. First, allow the system to complete its safety cooling cycle. Laboratory microwave systems are designed with reinforced cavities to contain explosive force and any debris in the event of a vessel failure [12]. The system will contain the energy and contents of the failure, and a well-designed unit should not sustain permanent damage [12]. Only once the system indicates it is safe to open should you proceed with cleanup.
Q2: What personal protective equipment (PPE) is essential for the cleanup process? At a minimum, you must wear sanitized indirectly vented chemical splash goggles, a lab coat, and appropriate vinyl or nitrile gloves [58]. Always handle contaminated components within a laboratory fume hood to eliminate the risk of inhaling toxic fumes that may be released from reagents and solvents [12].
Q3: After a failure, is the microwave system itself still safe to use? Yes, if the system is a properly designed laboratory-grade instrument. A key safety feature of these systems is that they can withstand a vessel failure, be cleaned, and be placed back into service, often in a matter of minutes [12]. However, you must perform a thorough inspection and decontamination before returning the system to operation.
Q4: What are the common causes of vessel failure I should be aware of? The primary causes include [12]:
- Exceeding the pressure or temperature rating of the vessel.
- Using vessels beyond their serviceable lifetime.
- Using an incorrect vessel type (e.g., one not certified by the manufacturer).
- Performing a highly exothermic reaction that becomes uncontrolled due to the rapid energy transfer of microwave irradiation.
Troubleshooting Guide: Cleanup and Decontamination
Cleanup Workflow
The following diagram outlines the critical steps for responding to and recovering from a vessel failure.
Decontamination Methods for Specific Contaminants
Different types of chemical residues require specific cleaning methods. The table below summarizes effective protocols based on the nature of the contamination.
| Contaminant Type | Recommended Cleaning Method | Protocol Details | Efficiency/Outcome |
|---|---|---|---|
| General Residues & Debris | Mechanical Removal & Detergent Wash | After ensuring the cavity is cool, remove large debris. Wash all surfaces and components with a laboratory-grade detergent and rinse thoroughly with purified water [59]. | Physical removal of bulk contaminants. |
| Chloride Species (e.g., from Aqua Regia) | Thermal Treatment | Heat components in a laboratory oven at 150°C for 1 hour. This method desorbs hydrogen chloride trapped in polymer matrices [60]. | ~98.5% decontamination [60]. |
| Chloride Species (Alternative) | Alkaline Treatment | Submerge or treat components with a solution of sodium hydroxide (NaOH) or ammonia (NH₃) [60]. | ~95% decontamination [60]. |
| Trace Metals & Routine Decon. | Acid Reflux Cleaning | Use an automated acid steam cleaner (e.g., traceCLEAN) where nitric acid vapors reflux within a sealed unit, leaching metal contaminants [61]. | Highly effective for ultra-trace analysis; removes surface contamination [61]. |
| Stubborn/Deep Contamination | Acid Soaking | Submerge vessels in acids like nitric acid or hydrochloric acid and heat for an hour or more to remove contaminants diffused into the vessel walls [59]. | Removes deeply embedded contaminants; may require large acid volumes [61]. |
Post-Cleanup Inspection and Verification
Before returning the system to service, you must:
- Inspect the System: Check the microwave cavity door, seals, and hinges for any signs of damage. Never operate a microwave with damaged door seals due to the risk of radiation leakage [58].
- Verify Cleaning Efficacy: Perform a blank run using the cleaned vessels with the typical acids and volumes used in your digestion process, but without a sample. Analyze the blank to ensure no contamination is detected above acceptable levels [61].
The Scientist's Toolkit: Essential Materials for Cleanup and Safety
| Item or Reagent | Function in Containment/Cleanup |
|---|---|
| Laboratory-Grade Microwave System | Features reinforced, corrosion-resistant cavities and doors designed to contain vessel failures and prevent explosive force from escaping [12]. |
| Indirectly Vented Goggles, Lab Coat, Gloves | Personal Protective Equipment (PPE) to shield against chemical splashes, sharp debris, and toxic fumes during cleanup [58]. |
| Sodium Hydroxide (NaOH) or Ammonia (NH₃) | Alkaline cleaning reagents used to effectively remove chloride species contamination from vessel polymer matrices [60]. |
| Nitric Acid (HNO₃) | Used for acid soaking or in acid steam cleaning systems to remove trace metal contaminants and organic residues from vessel surfaces [61] [59]. |
| Laboratory Oven | Provides thermal treatment for the decontamination of vessels contaminated with chloride species, offering a highly effective and reagent-free cleaning method [60]. |
| Secondary Containment Tray | Used to catch spills during transport or cleanup, preventing the spread of hazardous materials on benchtops [58]. |
Managing Superheating, Solvent Decomposition, and Localized Heating
Troubleshooting Guides
This guide addresses common heating-related issues in microwave-assisted synthesis, providing researchers with methodologies to ensure safe and efficient reactions.
1. How do I troubleshoot a sudden pressure spike or uncontrolled temperature increase during a reaction?
A sudden pressure spike often indicates a runaway exothermic reaction or rapid solvent decomposition [62] [63].
- Step 1: Immediate Safety Action. The microwave reactor should automatically shut off power and begin active cooling if it detects that pressure or temperature values have exceeded the safe operating envelope. Do not attempt to open the reaction vessel until it has cooled completely to room temperature [62] [64].
- Step 2: Post-Reaction Analysis.
- Review Reaction Kinetics: Re-evaluate the thermodynamics of your reaction. Use reaction calorimetry to understand the energy released and the rate of the reaction [63].
- Check Solvent Stability: Consult the Material Safety Data Sheet (MSDS), specifically Section 10 (Stability and Reactivity), to confirm the thermal decomposition point of your solvent [62].
- Analyze Scale: Remember that heat generation can outpace cooling capacity when scaling up reactions. Perform adiabatic calorimetry to understand the hazards at a larger scale [63].
- Step 3: Experimental Redesign.
- Reduce Scale: Start with smaller amounts of reagents [62].
- Lower Temperature: Begin with a lower power level and temperature setting. You can always increase these parameters in subsequent experiments [62].
- Use a Stirring Mechanism: Ensure adequate stirring with a heavy stir bar to prevent localized hot spots that can trigger decomposition [62] [64].
2. What should I do if I observe charring, discoloration, or an unexpected solid coating on the vessel walls?
This is a classic sign of localized superheating, often occurring in viscous samples or solvent-free reactions where reagents are adsorbed onto a solid surface [62].
- Step 1: Improve Agitation. Localized heating occurs when there is insufficient mixing. Use a larger, heavier stir bar suitable for pressurized reactions to ensure even heat distribution [62].
- Step 2: Evaluate Reaction Composition.
- If performing solvent-free reactions, ensure the solid mixture is finely ground and well-mixed to avoid static pockets of material.
- Consider if a metallic catalyst has plated onto the vessel wall, creating a highly microwave-absorbent layer. This coating can heat extremely quickly and melt the reaction tube [62].
- Step 3: Clean Vessel Thoroughly. Before the next experiment, completely clean the vessel to remove any conductive residue that could cause arcing or uneven heating in future runs [62].
3. How can I prevent solvent decomposition in my experiments?
Solvent decomposition is a function of time and temperature, and can produce hazardous byproducts and pressure [64].
- Step 1: Pre-Experiment Stability Check. Always consult the solvent's MSDS to determine its thermal stability and decomposition temperature before designing your experiment [62] [64].
- Step 2: Optimize Reaction Parameters. Do not unnecessarily exceed the solvent's boiling point. Use the Arrhenius principle—increasing temperature reduces time—but stay within the solvent's stable range. The table below shows how reaction time decreases with temperature, but the maximum temperature is limited by solvent stability [65] [64].
- Step 3: Select an Appropriate Solvent. Choose a solvent with a boiling point that safely allows your target reaction temperature. The table below classifies common solvents by their microwave absorption efficiency (tan δ) [65].
Table: Solvent Classification by Microwave Absorption (tan δ) [65]
| Absorption Level | Solvent Examples | tan δ Value |
|---|---|---|
| High | Ethylene Glycol | 1.350 |
| Ethanol | 0.941 | |
| DMSO | 0.825 | |
| Medium | 2-Butanol | 0.447 |
| Acetic Acid | 0.174 | |
| Water | 0.123 | |
| Low | Chloroform | 0.091 |
| Tetrahydrofuran | 0.047 | |
| Hexane | 0.020 |
Table: Reaction Time Reduction with Increasing Temperature (Illustrative Example) [65]
| Reaction Temperature (°C) | 80 | 90 | 100 | 110 | 120 | 130 | 140 | 150 | 160 |
|---|---|---|---|---|---|---|---|---|---|
| Reaction Time | 8 h | 4 h | 2 h | 1 h | 30 min | 15 min | 8 min | 4 min | 2 min |
Frequently Asked Questions (FAQs)
Q1: Can I use a domestic kitchen microwave oven for my chemical synthesis experiments? A: No. You must never use a domestic microwave oven for chemical reactions. These ovens lack safety controls, are not designed to contain chemical explosions, and can be corroded by solvents and acids. Always use a dedicated laboratory-grade microwave reactor, which features reinforced cavities, pressure and temperature monitoring, and automatic safety shut-offs to contain vessel failures [66] [62].
Q2: Is it safe to heat flammable solvents in a microwave reactor? A: No. You should not heat flammable solvents unless you are using an explosion-proof laboratory-grade microwave reactor specifically designed for that purpose. Heating flammables in a standard lab microwave presents a severe fire and explosion risk [66].
Q3: My reaction mixture includes a non-polar solvent (e.g., hexane) that doesn't heat well. What can I do? A: Even if your primary solvent has a low tan δ and is microwave-transparent, the polar substrates, reagents, or catalysts in your mixture will often absorb energy sufficiently. If the overall mixture still will not heat, you can add a passive heating element (e.g., a silicon carbide stir bar or chip) that absorbs microwaves effectively and transfers heat to the reaction mixture [65].
Q4: Are there any functional groups that are particularly hazardous under microwave heating? A: Yes. Exercise extreme caution with compounds containing energetic functional groups, such as azide and nitro groups, as they are known to cause explosions under thermal heat. The fast energy transfer of microwave irradiation can exacerbate these risks. Always perform a thorough Chemical Reaction Hazard (CRH) analysis, including desktop studies and thermal screening, before attempting such reactions [62] [63].
Q5: What is the most critical safety device in the lab when performing microwave synthesis? A: The most critical safety device is a trained and knowledgeable operator. While engineered controls are vital, the operator's understanding of reaction kinetics, solvent stability, and equipment limitations is the best defense against accidents [62].
The Scientist's Toolkit: Essential Research Reagent Solutions
Table: Key Materials for Microwave-Assisted Synthesis
| Item | Function & Rationale |
|---|---|
| Dedicated Laboratory Microwave Reactor | Designed to safely contain vessel failures and withstand corrosive chemicals. It provides precise control and monitoring of temperature and pressure, which is impossible with domestic ovens [66] [62]. |
| Stir Bar (heavy-duty) | Prevents localized superheating by ensuring even mixing and heat distribution throughout the viscous reaction mixture, which is crucial for suppressing byproducts and runaway reactions [62]. |
| Silicon Carbide (SiC) Passive Heater | Used to heat reaction mixtures that are otherwise microwave-transparent (e.g., in non-polar solvents). SiC absorbs microwaves efficiently and transfers heat to the reaction via conduction [65]. |
| Certified Pressure Vessels | Reaction vessels and accessories certified by the manufacturer for use in a specific microwave cavity. Using uncertified vessels can lead to equipment failure and violent reactions [62]. |
| Material Safety Data Sheet (MSDS) | Provides critical information on the thermal stability, decomposition temperature, and reactivity of all chemicals used. This is essential for defining a safe operating envelope [62] [64]. |
Experimental Workflow for Safe Microwave Synthesis
The following diagram outlines a systematic workflow for safely planning and executing a microwave-assisted reaction, integrating hazard analysis and safety checks.
Microwave Heating vs. Conventional Heating
This diagram contrasts the fundamental temperature gradients created by conventional reflux heating and microwave "in-core" heating, which is key to understanding the efficiency and risks of microwave synthesis.
A technical support resource for researchers
This guide provides troubleshooting and best practices for optimizing key parameters in microwave-assisted chemical reactions, with a primary focus on maintaining safety throughout the experimental process.
Troubleshooting Guides
Problem 1: Unusually High Pressure or Unexpected Reaction Rates
Potential Cause: Runaway exothermic reaction triggered by rapid microwave energy input [12].
Risks:
- Vessel failure due to pressure exceeding design limits [12].
- Decomposition of solvents or reagents into hazardous components [12].
Solutions:
- Start Small and Low: Begin optimization with small reagent quantities and low power or temperature settings. Increase parameters gradually in subsequent experiments [12].
- Understand Reaction Kinetics: Review the Material Safety Data Sheet (MSDS) for reagent stability at high temperatures before starting the experiment [12].
- Ensure Adequate Stirring: Use a heavy stir bar in pressurized systems to prevent localized superheating, which is common in viscous samples or solvent-free reactions [12].
Problem 2: Inconsistent Results Between identical Experiments
Potential Cause: Non-uniform energy distribution within the microwave cavity [67].
Risks:
- Failed experiments and wasted resources.
- Potential for unanticipated hazardous by-products due to irregular reaction pathways.
Solutions:
- Use Certified Equipment: Always use reaction vessels and accessories certified by the microwave system manufacturer. Non-certified items can cause energy field irregularities [12].
- Verify Cavity Integrity: Regularly inspect the microwave cavity and door seals for damage. Never operate a unit with compromised seals [68].
- Apply Scalable Algorithms: For complex optimizations, utilize machine learning frameworks like Minerva, which are designed to handle high-dimensional search spaces and experimental noise, leading to more robust and reproducible conditions [69].
Problem 3: Metal-Coated Vessel Walls or Suspected Arcing
Potential Cause: Use of ungrounded metal filings or deposition of metallic catalysts on vessel walls [12].
Risks:
- Damage to the reaction vessel through melting.
- Potential for arcing, which can damage the microwave cavity and create a fire hazard.
Solutions:
- Use Catalysts Appropriately: Small amounts of grounded transition metal catalysts are generally safe and will not cause arcing. Avoid ungrounded metal filings or powders [12].
- Clean Vessels Thoroughly: Metallic coatings from previous reactions can absorb energy and overheat. Ensure vessels are properly cleaned after each use [12].
Frequently Asked Questions (FAQs)
Q1: Can I use a domestic microwave oven for my chemical synthesis experiments? A1: No. Domestic microwave ovens lack the safety controls, corrosion-resistant cavities, and pressure containment features required for laboratory synthesis. Using them poses significant risks of explosion, corrosion, and exposure to toxic fumes. Always use a purpose-built laboratory microwave reactor [12] [68].
Q2: How does microwave heating differ from conventional heating in affecting reaction pathways and safety? A2: Microwave irradiation provides rapid, volumetric, and internal heating, which can dramatically accelerate reaction rates. However, this can also lead to unexpected reactivity. For instance, in food chemistry, microwave heating at high power can promote greater formation of carcinogenic acrylamide compared to conventional methods. Understanding these differences is crucial for predicting and controlling reaction outcomes and by-products [70].
Q3: What is the most critical safety practice for a new microwave chemist? A3: Become a trained and knowledgeable operator. The most important safety device is a well-trained user. Familiarize yourself with the specific equipment, the chemistry being performed, and the relevant Standard Operating Procedures (SOPs). Always work within a laboratory fume hood to eliminate inhalation of toxic fumes [12] [68].
Q4: Are there systematic approaches to optimizing multiple reaction parameters safely? A4: Yes. Methodologies like Response Surface Methodology (RSM) and machine learning-guided frameworks like Minerva allow for efficient exploration of complex parameter spaces (e.g., temperature, catalyst amount, reagent ratio). These approaches help identify optimal and safe reaction conditions with fewer experiments than traditional one-factor-at-a-time approaches, reducing overall experimental risk [69] [71].
Q5: What personal protective equipment (PPE) is essential when operating a microwave reactor? A5: At a minimum, wear sanitized, indirectly vented chemical splash goggles, a lab coat, and appropriate gloves (e.g., vinyl or nitrile). Secondary containment, such as a tray under reaction vessels, should also be used to catch spills [68].
Parameter Optimization Data
The following table summarizes general optimization strategies for key microwave reaction parameters. Note that optimal values are highly reaction-dependent and must be determined empirically.
| Parameter | Optimization Strategy | Safety Considerations |
|---|---|---|
| Power | Start low; use power to control reaction rate, not just final temperature. High power can cause violent boiling or decomposition. | High power can lead to rapid pressure buildup and uncontrolled exothermic reactions. Use power-cycling features to maintain control [12]. |
| Temperature | Optimize in increments of 10-20°C. Use temperature ramping for multi-step reactions. Higher temps speed up kinetics but can lower selectivity. | Know the thermal stability limits of all reagents and solvents. Exceeding these limits leads to decomposition and hazardous by-products [12] [72]. |
| Time | Monitor reaction progress (e.g., via TLC, HPLC). Shorter times can improve selectivity; longer times may increase yield but also by-products. | Extended irradiation can cause carbonization of residues, leading to smoke, fires, or pressure buildup from decomposition gases [68] [72]. |
| Stirring | Ensure adequate and robust stirring for the entire reaction duration. | Prevents localized superheating ("hot spots") and the formation of metallic coatings on vessel walls, which can melt the reactor tube [12]. |
Table 1: Guidelines for optimizing key microwave reaction parameters while prioritizing safety.
Experimental Protocol: RSM for Tri-Reforming of Methane
The following methodology details the application of Response Surface Methodology (RSM) for optimizing a tri-reforming process, serving as a template for systematic parameter investigation [71].
1. Objective To optimize reaction parameters (Temperature, Catalyst Amount, O2/CH4 Ratio) for the tri-reforming of methane over a Ni-Silica catalyst to produce synthesis gas with an H2/CO ratio of 1.6.
2. Experimental Design
- A Central Composite Design (CCD) with five levels for each factor was used.
- Independent Variables:
- Reaction Temperature: 600 - 800 °C
- Catalyst Amount: 0.3 - 1.0 g
- O2/CH4 Feed Ratio: 0.1 - 0.3
- Responses: CO2 Conversion, H2/CO molar ratio, H2 Selectivity.
3. Procedure
- Catalyst Preparation: The Ni-Silica catalyst (5 wt% Ni loading) was synthesized via the wet impregnation method using nickel nitrate hexahydrate and silicon(IV) oxide, followed by calcination [71].
- Reaction Setup: Experiments were conducted in a fixed-bed tubular reactor under the conditions specified by the CCD matrix.
- Data Collection: The product stream was analyzed to determine CO2 conversion, H2/CO ratio, and H2 selectivity for each experimental run.
- Model Fitting & Optimization: Data was fitted to a second-order polynomial model. Analysis of Variance (ANOVA) was used to validate the model's significance. The desirability function approach was applied to find the optimal parameter set that maximizes the H2/CO ratio.
4. Outcome The RSM model successfully identified optimized conditions that produced a synthesis gas with an H2/CO ratio of 1.6, which was experimentally validated [71].
Workflow Visualization
The following diagram illustrates the integrated workflow for the safe and optimized operation of a microwave chemical reactor, incorporating both preparation and experimental phases.
Safe Microwave Reactor Workflow
The Scientist's Toolkit
Table 2: Essential research reagents and materials for microwave-assisted reactions, highlighting their function and critical safety notes.
| Item | Function & Application | Key Safety Notes |
|---|---|---|
| Laboratory Microwave Reactor | Dedicated instrument for chemical synthesis with precise control over temperature, pressure, and power. | Must have reinforced cavity, safety interlocks, and pressure containment. Never use a domestic microwave oven [12] [68]. |
| Certified Reaction Vessels | Pressurized tubes designed for specific microwave systems to withstand high temperature and pressure. | Using non-certified vessels risks failure. Regularly inspect for cracks or damage and do not exceed pressure/temperature ratings [12]. |
| Polar Solvents (e.g., Water, DMF) | Efficiently absorb microwave energy, enabling rapid heating of the reaction mixture. | Check thermal stability. Flammable solvents require explosion-proof lab-grade microwaves [68] [47]. |
| Transition Metal Catalysts (e.g., Ni, Pd) | Small, grounded amounts can enhance reaction rates and selectivity in cross-coupling reactions. | Avoid ungrounded metal filings to prevent arcing. Metallic coatings on vessel walls can cause localized melting [12] [69]. |
| Stir Bar | Ensures homogeneous mixing and temperature distribution, preventing dangerous hot spots. | Use a heavy stir bar adequate for pressurized reactions to maintain mixing efficiency [12]. |
The best microwave safety device is a trained and knowledgeable operator. [12]
Fire Extinguisher Placement and Protocols
Where should I place a Class ABC fire extinguisher in a lab?
Place Class ABC fire extinguishers in highly visible and easily accessible locations along lab exit routes. They must be located near the lab entrance and in close proximity to the microwave workstation, but not in a way that would block access in an emergency. [73]
Specific placement guidelines include:
- Mount at a accessible height, typically on a wall bracket, for quick retrieval.
- Ensure the location is well-lit and free from obstructions like equipment or storage.
- Do not block egress paths or crowd benchtops with the extinguisher. [73]
What type of fire extinguisher is required for a microwave lab?
A Class ABC fire extinguisher is essential. This single type is effective against multiple fire risks present in a microwave lab environment: [73]
- Class A: For fires involving ordinary combustibles like paper, wood, or plastic.
- Class B: For fires involving flammable liquids, solvents, and gases.
- Class C: For fires involving energized electrical equipment, such as the microwave unit itself.
How do I maintain a fire extinguisher?
Regular inspection is crucial for ensuring a fire extinguisher is operational when needed. Follow this maintenance schedule:
| Maintenance Task | Frequency | Key Actions |
|---|---|---|
| Visual Inspection | Monthly | Check for physical damage, verify pressure gauge is in the green zone, ensure pin and seal are intact. [74] |
| Professional Service | Annually | Have a certified technician inspect and service the unit. |
| Internal Maintenance | Every 6 years | Conduct a detailed internal examination and recharge as per NFPA 10. [74] |
Spill Kit Placement and Composition
Where should spill kits be located in the laboratory?
Spill kits must be placed in a designated, known location that is immediately accessible from the microwave and other chemical handling areas. [75] All laboratory staff must know where the spill control equipment is kept. [75]
- Strategic Placement: Locate kits near potential spill sources, such as the microwave workstation, solvent storage areas, and chemical hoods.
- Accessibility: Ensure the kit is not locked away or blocked by equipment. It should be possible to grab it quickly without moving other items.
- Signage: The location should be clearly marked. [75]
What should a general-purpose chemical spill kit contain?
A basic spill kit for a microwave lab should be equipped to handle a variety of common chemical spills. The table below details the essential components: [75]
| Component Category | Specific Items | Function |
|---|---|---|
| Absorbent Materials | Absorbent pads, socks/booms, pillows, loose absorbent (e.g., vermiculite, clay) [76] [75] | Soak up and contain spilled liquids. |
| Containment & Cleanup | Plastic scoops, dustpans, brooms, heavy-duty plastic bags, hazardous waste labels [75] | Confine the spill and safely collect waste. |
| Personal Protective Equipment (PPE) | Chemical-resistant gloves (nitrile/neoprene), chemical splash goggles, lab coat, face shield. [73] [75] | Protect the responder during cleanup. |
| Additional Safety Items | Spill warning sign, first aid kit [75] | Secure the area and address potential injuries. |
How do I choose the right type of spill kit?
Select a spill kit tailored to the specific hazards in your lab. The three main types are:
- Universal Spill Kits: Designed for a wide range of non-aggressive liquids, including water-based coolants and weak acids/bases. They are a versatile choice for general lab use. [76]
- Oil-Only Spill Kits: Specialized for hydrocarbon-based liquids like hexane or heptane. Their absorbents repel water, making them ideal for solvent spills. [76]
- Hazmat Spill Kits: Used for aggressive chemicals, including strong acids and caustics. These kits often contain color-changing neutralizers and are essential for high-risk synthesis work. [76]
What are the maintenance requirements for a spill kit?
A spill kit is only useful if it is fully stocked and ready. Implement these maintenance practices:
- Regular Inspection: Check the kit monthly for restocking needs and inspect PPE for degradation. [74] [75]
- Immediate Restocking: Replace all used components immediately after a spill incident. [75]
- Inventory Log: Maintain a checklist inside the kit to log inspections and track usage.
- Chemical Compatibility Review: Periodically reassess the kit's contents to ensure they match the chemicals currently in use in the lab.
Troubleshooting & FAQs
What should I do if a reaction overheats and creates smoke in the microwave?
- Step 1: Do not open the microwave door immediately. The laboratory-grade microwave is a reinforced containment device. [12]
- Step 2: Allow the system to cool down internally with the door closed to prevent a potential flash fire.
- Step 3: If smoke is excessive, evacuate the area and activate the fire alarm.
- Step 4: Once cooled, wear appropriate PPE and carefully open the microwave in a fume hood to vent any fumes or vapors.
We have a kitchen-style microwave in the lab. Is that safe for chemical reactions?
No. Domestic microwave ovens are not safe for laboratory chemistry. [12] They lack critical safety controls and are not built to contain a chemical explosion. Use only microwave systems specifically designed for laboratory use, which feature: [12]
- Reinforced, corrosion-resistant cavities and doors for explosion containment.
- Automated power, temperature, and pressure monitoring with safety shut-offs.
- Certified reaction vessels designed to handle pressure and temperature extremes.
Our spill kit only has universal absorbents. Can I use it on any chemical?
No. Universal absorbents are for non-aggressive liquids. Using the wrong absorbent can worsen the situation. Before a spill happens, consult your chemical inventory and Safety Data Sheets (SDS) to identify the specific hazards. For aggressive chemicals like strong acids or caustics, you must have a specialized Hazmat Spill Kit. [76]
How often should emergency equipment training be conducted?
Training should be conducted:
- During initial onboarding for all new lab personnel.
- Annually as a refresher for all staff.
- Immediately whenever new equipment is installed or procedures are updated.
Emergency Response Workflow
The diagram below outlines the critical decision-making process and immediate actions required during an emergency involving a microwave reaction.
The Scientist's Toolkit: Essential Materials for Safe Microwave Chemistry
| Item / Solution | Function / Purpose |
|---|---|
| Laboratory-Grade Microwave | Designed for chemical synthesis with reinforced containment, temperature/pressure sensors, and corrosion-resistant cavities. [12] |
| Certified Reaction Vessels | Manufacturer-approved sealed tubes designed to withstand high pressure and temperature; using incorrect vessels risks failure. [12] |
| Class ABC Fire Extinguisher | For combating fires involving combustibles (A), flammable liquids (B), and electrical equipment (C) like the microwave itself. [73] |
| Chemical Spill Kit | Contains materials for immediate containment and cleanup of accidental chemical releases, preventing environmental contamination and exposure. [75] |
| Chemical Splash Goggles & Lab Coat | Minimum PPE for protecting eyes and skin from chemical splashes during routine handling and spill response. [73] |
| Material Safety Data Sheet (MSDS/SDS) | Provides critical information on chemical stability, reactivity, and decomposition products at high temperatures. [12] |
Addressing Arcing, Stirring Failures, and Catalyst-Specific Issues
Troubleshooting Guides
Microwave-Induced Arcing
Q: What causes arcing in my microwave reactor, and how can I stop it?
Arcing, the visible sparking within the microwave cavity, poses a significant risk of damaging equipment and aborting reactions. The table below summarizes the primary causes and their respective solutions.
Table: Troubleshooting Guide for Microwave-Induced Arcing
| Cause | Description | Immediate Action | Preventive Measure |
|---|---|---|---|
| Ungrounded Metal Catalysts | Metal filings or ungrounded metals act as an arc source within the microwave field [12]. | Stop the reaction immediately. Inspect for vessel damage. | Use only small amounts of ground metal catalysts [12]. |
| Metallic Coating on Vessel | A metallic coating on the vessel wall from reagents absorbs energy, heats quickly, and can cause arcing or melt the tube [12]. | Clean the vessel thoroughly before subsequent use. | Ensure adequate stirring to prevent reagent deposition [12]. |
| Non-Certified Vessels & Accessories | Using vessels or accessories not designed for the specific microwave system can lead to equipment failure and arcing [12]. | Only use certified pressure tubes and accessories from the original manufacturer [12]. | Always source consumables directly from the instrument manufacturer. |
Stirring Failures
Q: My reaction mixture is not stirring properly. What should I check?
Stirring is critical for uniform heat distribution and reaction efficiency. A failure can lead to localized superheating and inaccurate results [12].
Table: Troubleshooting Guide for Stirring Failures
| Cause | Description | Immediate Action | Preventive Measure |
|---|---|---|---|
| Power Supply Issues | The stirrer may not receive power due to a faulty connection or damaged component [77]. | Check the power cord connection and inspect the power insurance管 [77]. | Perform a pre-run equipment check. Use a regulated power source. |
| Motor or Transformer Failure | The internal components of the stirrer may be damaged [77]. | Contact technical support; may require motor or transformer replacement [77]. | Avoid voltage fluctuations and overloading the device. |
| High Media Viscosity | The viscosity of the reaction mixture may be too high for the magnetic stirrer to overcome [77]. | Switch to a more powerful stirrer or an electric mechanical stirrer [77]. | Assess solution viscosity before starting and select appropriate equipment. |
| Stir Bar Damage or Obstruction | The stir bar may be broken, or the reaction may contain solids that cause jamming [78]. | Check the stir bar for integrity and ensure it rotates freely. | Visually inspect the stir bar before each use. Use a heavier stir bar for pressurized reactions [12]. |
Catalyst-Specific Issues
Q: Are there special precautions for using catalysts in microwave-assisted reactions?
Yes, while catalysts like transition metals are highly effective and can be safely used, they require specific considerations to prevent arcing and manage exothermic risks [12].
Table: Troubleshooting Guide for Catalyst-Specific Issues
| Challenge | Risk | Mitigation Strategy |
|---|---|---|
| Catalyst Form | Ungrounded metal filings are a primary cause of dangerous arcing [12]. | Use catalysts in a finely ground, powdered form. |
| Exothermic Reactions | Reactions involving azide or nitro groups can pose explosion risks under rapid microwave heating [12]. | Treat all exothermic reactions with extreme care. Start with small amounts of reagents at low power [12]. |
| Reaction Kinetics | Unfamiliarity with reaction kinetics can lead to runaway reactions that exceed the vessel's pressure limits [12]. | Be aware of the potential kinetics and stability of reagents at high temperatures before scaling up [12]. |
Frequently Asked Questions (FAQs)
Q: Is it safe to use a domestic microwave oven for my chemical synthesis experiments? A: No. Domestic microwave ovens are not designed for laboratory use. They lack safety controls for power, temperature, and pressure monitoring. Their cavities are not corrosion-resistant and cannot withstand the explosive force from a vessel failure, creating a significant safety hazard. Always use a purpose-built laboratory microwave system with a reinforced cavity and safety interlocks [12].
Q: What is the most important safety device in a microwave synthesis laboratory? A: A trained and knowledgeable operator. While equipment has built-in safety features, the operator's understanding of the chemistry, kinetics, and equipment is the primary defense against accidents. Familiarity with the hardware and chemical stability is imperative [12].
Q: I am about to run a new reaction for the first time in the microwave reactor. What is a safe way to start? A: If you are unsure about a reaction, always start small. Use small amounts of reagents and begin with a low power level and temperature. You can always increase the temperature or power level after observing the initial results. This minimizes risk while providing valuable data on the reaction's behavior [12].
Q: Can I use transition metals as catalysts in microwave-assisted reactions? A: Absolutely, and they often enhance reactions. The key is to use only small amounts of ground (powdered) material, as this will not cause arcing. Avoid metal filings and other ungrounded metals within the microwave field [12].
Experimental Protocols & Safety Workflows
Pre-Experiment Safety Checklist Protocol
This protocol must be completed before initiating any microwave-assisted reaction.
- Chemical Risk Assessment: Consult the Material Safety Data Sheet (MSDS) for all reagents, specifically Section 10 (Stability and Reactivity) to identify decomposition risks at high temperatures [12].
- Equipment Integrity Check:
- Confirm the use of manufacturer-certified vessels and accessories [12].
- Visually inspect the reaction vessel for cracks, scratches, or metallic coatings.
- Ensure the vessel seals are clean, undamaged, and properly seated.
- Stirring Verification:
- Confirm the stir bar is intact and rotates freely.
- Perform a test run with the solvent to ensure stirring is effective, especially for viscous mixtures [12].
- Catalyst Preparation: Verify that any metal catalysts are in a finely ground, powdered form—not as filings [12].
Protocol for Safe Method Development for New Reactions
This methodology outlines a cautious approach to scaling new microwave-assisted reactions.
Aim: To safely determine the optimal parameters (power, temperature, time) for a novel microwave-assisted synthesis while minimizing risk. Principle: Begin with small quantities and low energy input, then gradually scale based on observed results [12].
Detailed Methodology:
- Initial Miniature Reaction:
- Use small amounts of reagents (e.g., 10-50 mg scale).
- Set a conservative low power level (e.g., 50-100W) and a low temperature limit well below the solvent boiling point or reagent decomposition temperature.
- Use a short reaction time (e.g., 1-5 minutes).
- Monitor pressure and temperature profiles closely.
- Result Observation & Analysis:
- After the run, check for unexpected precipitation, vessel coating, or pressure surges.
- Analyze the product yield and conversion.
- Parameter Escalation:
- If the reaction proceeds safely but is incomplete, systematically increase one parameter at a time (e.g., temperature, then time, then power).
- Never maximize all parameters simultaneously in an unknown reaction.
- Exothermic Reaction Testing:
- For reactions suspected to be exothermic, this small-scale approach is critical. A runaway exothermic reaction will only stop when the available fuels are expended and can happen at an alarmingly fast rate, exceeding the vessel's venting capacity [12].
The Scientist's Toolkit: Essential Research Reagent Solutions
Table: Key Materials and Equipment for Safe Microwave-Assisted Synthesis
| Item | Function & Importance |
|---|---|
| Laboratory Microwave System | Purpose-built for synthesis; features corrosion-resistant stainless steel cavities, reinforced doors, and power/temperature/pressure monitoring with automatic safety controls. Essential for containment in case of vessel failure [12]. |
| Certified Pressure Vessels & Accessories | Vessels designed and tested for specific microwave systems. Using non-certified items will most assuredly result in equipment failure [12]. |
| Finely Ground Metal Catalysts | Small amounts of ground transition metal catalysts are safe and effective. They enhance organometallic reactions without causing arcing, unlike metal filings [12]. |
| Adequate Stirring System | Prevents localized superheating and metallic coating on vessel walls. For pressurized reactions, a heavier stir bar is recommended. For very viscous mixtures, a mechanical stirrer may be necessary [12] [77]. |
| Material Safety Data Sheet (MSDS) | The primary source for chemical safety information, especially Section 10 (Stability and Reactivity), which details decomposition risks at high temperatures [12]. |
Validating Safety and Efficacy: Comparative Analysis and Green Chemistry
FAQs on Safety and Best Practices
Q1: What are the primary safety risks of using conventional open-vessel heating methods for chemical reactions?
Conventional open-vessel heating, such as with hot plates, oil baths, or heating mantles, presents several inherent safety risks:
- Pressurization and Boil-overs: These methods indirectly heat the container's outer surface, which can lead to uneven heating and localized superheating. This may cause violent boil-overs or, in closed systems, dangerous pressure build-up that can rupture vessels [79] [80].
- Poor Temperature Control: After the external heat source is shut off, the container itself remains hot and continues to transfer heat to the reaction mixture, making it difficult to control temperature overshoot. This is particularly hazardous for exothermic reactions [79].
- Exposure to Hazards: Open vessels expose operators to toxic fumes and volatile solvents, requiring constant use of a fume hood [81].
Q2: How does a sealed microwave reactor provide a safer alternative?
A dedicated microwave synthesis reactor is designed with multiple layers of safety focused on containment and control:
- Engineered Containment: The reaction vessel is housed within a reinforced, sealed cavity made of corrosion-resistant materials (e.g., stainless steel). This cavity is designed to contain the explosive force in the event of a vessel failure, protecting the operator [81].
- Active Pressure and Temperature Management: Systems feature real-time pressure and temperature sensors that feed data to the control system. If parameters approach safe limits, the system can automatically reduce microwave power or trigger pressure release mechanisms to safely vent excess pressure [79].
- Instantaneous Control: Microwave energy can be turned off instantaneously, stopping the heating process immediately. This is coupled with rapid compressed-air cooling to quickly quench a reaction, providing superior control over reaction kinetics and preventing thermal runaway [79].
Q3: Is it safe to use a domestic microwave oven for chemical synthesis experiments?
No. Using a domestic microwave oven for laboratory experiments is extremely dangerous and should never be attempted [81] [80].
- Lack of Safety Controls: Domestic ovens have no safety controls or monitoring for power, temperature, or pressure [81].
- Corrosion and Explosive Risk: The interior cavities are not designed to withstand corrosive chemicals or the explosive force from a vessel failure in a runaway reaction [81].
- Poor Reproducibility and Modification Risks: Safety interlocks can be easily compromised, and the microwave field is not uniform, leading to poor experimental reproducibility and extreme hazards [81] [80].
Q4: What specific reaction types require extra caution, even in a specialized microwave reactor?
While safer, operators must still exercise caution with certain chemistries:
- Energetic Functional Groups: Reactions involving compounds with azide or nitro groups, which are known to cause explosions with thermal heat, require careful evaluation [81].
- Exothermic Reactions: The rapid energy transfer of microwave irradiation can cause exothermic reactions to become uncontrolled very quickly, potentially exceeding the vessel's pressure relief capacity [81].
- Reactions with Metals: While small amounts of grounded metal catalysts are generally safe, metal filings or ungrounded metals can cause arcing within the microwave field [81].
Quantitative Safety Data
The safety advantages of containment systems can be quantified through their design specifications and performance metrics, as shown in the table below.
Table 1: Quantitative Safety Comparison: Conventional Open-Vessel vs. Sealed Microwave Reactor
| Safety Parameter | Conventional Open-Vessel Heating | Specialized Sealed Microwave Reactor | Safety Implication of Microwave System |
|---|---|---|---|
| Containment | None (or minimal glassware) | Reinforced stainless steel cavity [81] | Contains vessel failures and explosions, protecting the operator. |
| Pressure Management | Relies on glassware strength; no active control | Automated pressure release at set points (e.g., 300 psi) [79] | Prevents catastrophic vessel rupture by proactively venting excess pressure. |
| Temperature Control | Slow response; significant temperature overshoot [79] | Instantaneous power shut-off; integrated rapid air cooling [79] | Prevents thermal runaway and dangerous exotherms by stopping heat input immediately. |
| Operator Exposure | Direct exposure to fumes and solvents | Sealed system; fumes contained during operation [81] | Reduces risk of inhaling toxic vapors; exposure only possible during handling. |
| Reaction Volume Flexibility | Requires larger volumes for reliable temperature sensing [79] | Accurate temperature monitoring for volumes as low as 0.2 mL [79] | Allows for safe screening and optimization with minimal quantities of hazardous reagents. |
Experimental Protocol: Safely Transitioning a Reaction from Open-Vessel to Microwave Conditions
This protocol is designed for researchers transferring an existing conventional heating method to a sealed microwave reactor, prioritizing safety throughout the process.
Principle: The best microwave safety device is a trained and knowledgeable operator. Always start small, with low power and minimal reagent quantities [81].
Pre-Experimental Safety Checklist:
- Review MSDS: Check Section 10 (Stability and Reactivity) for all chemicals to understand their stability at high temperatures [81].
- Inspect Vessel: Ensure the reaction vessel is clean, undamaged, and within its serviceable lifetime. Do not use vessels that are scratched, cracked, or etched [81].
- Confirm Compatibility: Verify that reagents (e.g., strong alkalis) will not damage the vessel material (e.g., glass) [80].
- Plan for Hazards: Identify if the reaction is exothermic or involves hazardous functional groups (e.g., azides) [81].
Step-by-Step Procedure:
Initial Method Scoping (Low Power/Volume):
- Use a "microwave method converter" software tool if available [80].
- Scale down the reaction significantly. Use small amounts of reagents (e.g., 10-50 mg) in a small volume (e.g., 0.2 - 2 mL) [79] [80].
- Set the initial microwave power to a low level (e.g., 50-100 W) and set a conservative temperature target below the solvent's conventional boiling point [80].
Execute Preliminary Run:
- Ensure the vessel is properly sealed according to the manufacturer's instructions.
- Start the reaction and closely monitor the real-time temperature and pressure data.
- After the run, allow the system to cool completely before carefully opening the vessel in a fume hood.
Analysis and Ramp-Up:
- Analyze the reaction outcome. If the conversion is incomplete but stable, gradually increase the temperature or power level in subsequent runs [81].
- Systematically scale up the reaction volume only after safe and reproducible conditions are established at the smaller scale.
Final Method Optimization:
- Once a safe temperature and pressure window is identified, optimize the reaction time for maximum yield.
- For exothermic reactions, consider using the "power control" mode to limit the maximum microwave power delivered, thus controlling the reaction rate [81].
Safety Features and Logical Workflow
The following diagram visualizes how the key safety features in a modern microwave reactor interact to create a secure operational environment, centered on the principle of containment.
Diagram: Integrated Safety Layers in a Microwave Reactor. The system combines active electronic controls (primary layer) with passive physical containment (secondary layer), guided by external safety protocols.
The Scientist's Toolkit: Key Reagent and Material Solutions
Table 2: Essential Materials for Safe Microwave-Assisted Synthesis
| Item | Function / Safety Rationale |
|---|---|
| Certified Sealed Vessels | Reaction vessels tested and certified by the instrument manufacturer for specific temperature and pressure ranges (e.g., 300°C, 300 psi). Using non-certified vessels risks failure [81] [79]. |
| Stirring Bar | Ensures homogeneous mixing of the reaction mixture, preventing localized superheating ("hot spots") that can lead to violent boiling, pressure spikes, or decomposition of reagents [81]. |
| Inert Gas (e.g., N₂) | Used for pressurization and to create an inert atmosphere within the vessel, crucial for preventing combustion or oxidation in air- or moisture-sensitive reactions [79]. |
| Cooling System | Integrated compressed-air cooling rapidly quenches reactions after completion, providing precise control and quickly bringing the system to a safe temperature and pressure for handling [79]. |
Troubleshooting Guides
Q1: The microwave synthesis instrument shows no microwave energy output. What could be the cause and how can I resolve it?
A: This issue can arise from several sources. The most common causes and their solutions are outlined below.
| Fault Phenomenon & Signs | Possible Causes | Recommended Solutions |
|---|---|---|
| No microwave output after starting; Display shows "Low Power" or "No Load" messages [82]. | 1. Magnetron Aging: Cathode coating deterioration from long-term high-load operation [82].2. Waveguide Blockage: Crystalline residues or other obstructions in the microwave transmission path [82].3. Circulator Fault: Damage to the directional coupler preventing reflected power from recycling [82]. | 1. Clean the cavity and waveguide: Power down the instrument, disassemble the sample cavity, and clean the cavity and waveguide with an alcohol swab to remove any residue [82].2. Check magnetron current: If cleaning doesn't work, contact a service engineer to check the magnetron current (typically should be ~300mA). Replace the magnetron if necessary [82].3. Preventive maintenance: Perform scheduled maintenance every 200 reactions [82]. |
Q2: The actual reaction temperature significantly deviates from the set value. How should I recalibrate it?
A: Temperature control inaccuracies can compromise both reaction efficiency and safety.
| Fault Phenomenon & Signs | Possible Causes | Recommended Solutions |
|---|---|---|
| Temperature deviation > ±10°C; Abnormally slow heating rate [82]. | 1. Sensor Misalignment/Malfunction: Sample vial is off the detection focus, or the infrared sensor lens is contaminated [82].2. Faulty Control Algorithm: PID parameters are not optimized for the specific reagent type, causing overshoot or lag [82].3. Cooling System Failure: Dust accumulation on the condenser reduces heat dissipation efficiency [82]. | 1. Perform calibration: Access the instrument's calibration menu and perform a multi-point calibration using an empty load, a solvent blank, and a standard reference material [82].2. Inspect and clean: Clean the sensor window of any fingerprints or oil stains. Adjust the sample stage height to ensure the vial bottom is aligned with the detection zone [82].3. Test cooling system: Disconnect the microwave unit and independently test the heating module's performance to isolate the issue [82]. |
Q3: The instrument door frequently triggers a safety alarm during operation. Is this a serious fault?
A: The door safety interlock is a critical protection feature and should never be bypassed.
| Fault Phenomenon & Signs | Possible Causes | Recommended Solutions |
|---|---|---|
| Frequent safety interlock triggers during operation; Program terminates with an audible alarm [82]. | 1. Worn Door Mechanism: Lock tongue spring relaxation from repeated use leads to poor contact [82].2. Deformed Seal: High-temperature aging causes the door gasket to swell and bulge, hindering mechanical engagement [82].3. Faulty Switch: Vibration can cause short circuits from loose solder points on the circuit board [82]. | 1. Restart the instrument: A power cycle can sometimes clear transient signal errors [82].2. Manual check: Gently push the door to the fully closed position and observe if the status indicator turns off [82].3. Replace components: If the alarm persists, the door lock assembly may need to be inspected and components like the spring plate or silicone seal may require replacement (ensure correct model matching) [82].4. Do not use excessive force to close the door, as this may worsen the deformation [82]. |
Q4: Can I use a domestic microwave oven for my synthesis experiments to save costs?
A: No, using a domestic microwave oven for laboratory synthesis is strongly discouraged due to significant safety risks [80] [12].
| Aspect | Domestic Microwave Oven | Laboratory Microwave Synthesizer |
|---|---|---|
| Safety Design | Cavity not designed to withstand pressure from vessel failures; safety interlocks can be easily compromised [12]. | Reinforced stainless steel cavity and door to contain explosions; multiple safety interlocks [12]. |
| Process Control | No control or monitoring of temperature, pressure, or precise power [80] [12]. | Automated control and monitoring of power, temperature, and pressure; safety shutdown features [12]. |
| Corrosion Resistance | Standard interior is quickly corroded by acids and solvents [12]. | Corrosion-resistant materials are used in the cavity and components [12]. |
| Reproducibility | Poor microwave field uniformity leads to low experimental reproducibility [80]. | Designed for consistent energy distribution and high reproducibility [80] [12]. |
| Vessel Integrity | Uses non-reinforced containers not rated for high-pressure chemical reactions [80]. | Uses certified, robust reaction vessels designed for high temperature/pressure with venting mechanisms [12]. |
Frequently Asked Questions (FAQs)
Q1: Is microwave radiation itself dangerous? Can it cause cancer or other injuries?
A: No, the microwave radiation used in these instruments is not inherently dangerous or carcinogenic when the equipment is used properly [80]. The energy of microwave photons is actually lower than that of infrared radiation or visible light, both of which are commonly encountered without harm [80]. The real hazard is not the microwave energy itself, but the potential for high-temperature and high-pressure reactions to cause burns or explosions if safe operating procedures are not followed [80] [12]. Always use equipment designed for the specific laboratory task and receive proper training on its operation [12].
Q2: What are the key safety protocols I must follow when operating a microwave synthesizer?
A: Adherence to the following protocols is essential for safe operation [83] [46] [12]:
- Use Dedicated Lab Equipment: The microwave must be labeled "For Laboratory Use Only" and must never be used for food [83]. This prevents cross-contamination.
- Wear Appropriate PPE: At a minimum, wear indirectly vented chemical splash goggles, a lab coat, and heat-resistant gloves (e.g., vinyl or nitrile) [83].
- Inspect Vessels and Seals: Before each use, check reaction vessels for cracks, scratches, or other damage. Inspect the door seal and hinges for integrity. Never operate the instrument if any components are damaged [83] [12].
- Avoid Flammable Solvents and Certain Compounds: Do not heat flammable solvents unless using an explosion-proof laboratory-grade microwave [83]. Exercise extreme caution with compounds containing azide or nitro groups, which can explode under thermal stress [12].
- Never Run Sealed Vessels: Unless the vessel is specifically designed and certified for closed-vessel microwave synthesis, always ensure there is adequate venting (e.g., a loose cap) to prevent dangerous pressure buildup [83].
- Operate in a Fume Hood: Always work with chemicals inside a laboratory fume hood to avoid inhaling toxic fumes that may be released at high temperatures [12].
- Start Small and Scale Up: If you are unsure about a new reaction, start with small amounts of reagents and lower power settings. You can always scale up after observing the initial results [12].
Q3: How does microwave synthesis specifically enhance energy efficiency and promote safety?
A: Microwave synthesis offers distinct advantages over conventional heating methods in both efficiency and safety, as summarized in the table below.
| Feature | Conventional Heating | Microwave Synthesis | Key Benefit |
|---|---|---|---|
| Heating Mechanism | Slow, superficial heating relying on conduction/convection [84] [67]. | Direct, internal "volumetric" heating of molecules [84] [67]. | Drastically reduces reaction times from hours to minutes, saving energy [80] [67]. |
| Energy Efficiency | Low; significant heat loss to the environment [84]. | High; energy is transferred directly to the reaction mixture [84]. | Lowers energy consumption per synthesis, aligning with green chemistry principles [67]. |
| Process Safety | Open vessels or complex reflux setups expose users to hot surfaces and vapors. | Closed-system operation with robust safety controls and containment [12]. | Contains hazardous materials and minimizes researcher exposure to high temperatures and pressures [12]. |
| Reaction Control | Imprecise; risk of thermal runaway in exothermic reactions [12]. | Precise control and real-time monitoring of temperature and pressure [12]. | Prevents dangerous exothermic runaways by enabling immediate power reduction [12]. |
Q4: What is the most important rule for safe microwave synthesis?
A: The single most important rule is that "the best microwave safety device is a trained and knowledgeable operator" [12]. No amount of built-in engineering controls can fully compensate for a lack of understanding of the instrument's operation, the chemistry being performed, or the associated hazards. Always read the manual, receive proper training, and understand the kinetics and potential risks of your chemical reaction before starting [12].
Experimental Protocols & Data
Quantitative Comparison of Synthesis Methods
The following table summarizes quantitative data demonstrating the efficiency and improved outcomes of Microwave-Assisted Synthesis (MAS) compared to conventional methods, as cited in recent literature [80] [67].
| Application / Reaction Type | Conventional Method | Microwave-Assisted Method | Key Improvement & Relevance |
|---|---|---|---|
| Heck Reaction (C-C bond formation) [80] | 20 hours | 5 minutes | Time reduced by 99.6%, drastically accelerating R&D cycles [80]. |
| Hydrogenation Reaction [80] | 55% Conversion (Oil Bath) | 100% Conversion | Near-doubled conversion rate, enhancing yield and reducing waste [80]. |
| Fischer Indole Synthesis (Flow Chemistry) [80] | Not Specified | 3 mins, 90% Yield (Batch)15 mins, 88% Yield (Flow) | MAS enables scalable continuous flow processing with high yield [80]. |
| Esterification Reaction [84] | 200°C, 2 hours, 17% Yield | 180°C, 30 minutes, 83% Yield | Lower temperature, shorter time, higher yield demonstrates superior efficiency [84]. |
| General Nanomaterial Synthesis [67] | High energy consumption, long duration, significant waste. | Reduces energy, time, and hazardous waste. | MAS is a core technique for sustainable and green nanomaterial production [67]. |
The Scientist's Toolkit: Essential Research Reagent Solutions
| Item / Material | Function & Explanation |
|---|---|
| Certified Pressure Vessels | Reaction vessels specifically designed and tested by the manufacturer to withstand high temperatures and pressures. Using non-certified containers risks catastrophic failure [12]. |
| Microwave-Absorbing Solvents (Polar) | Solvents like water, DMF, or NMP have high dielectric loss, meaning they efficiently convert microwave energy into heat, enabling rapid heating of the reaction mixture [84]. |
| Stir Bars (Heavy-duty) | Adequate stirring is critical to prevent localized superheating ("hot spots") and to ensure uniform temperature and reaction progress, especially in viscous samples or pressurized reactions [12]. |
| Transition Metal Catalysts | Finely ground metal catalysts (e.g., Pd, Cu) can be used to enhance reactions. Small, ground particles generally do not cause arcing, unlike metal filings or foil [12]. |
| Ionic Liquids / Green Precursors | Used in green synthesis approaches for nanomaterials. MAS can be effectively integrated with these eco-friendly precursors to improve sustainability [67]. |
Safety Protocol Workflow Diagram
The following diagram illustrates the logical workflow and decision process for establishing and following safety protocols in microwave-assisted synthesis, based on the principles and requirements gathered from the search results.
This structured technical support resource, grounded in current manufacturer guidelines and safety literature, provides researchers with clear, actionable information to harness the benefits of microwave synthesis while maintaining the highest standards of laboratory safety.
Comparative Analysis of Reaction Kinetics and Byproduct Formation
Frequently Asked Questions (FAQs)
Q1: How does microwave heating fundamentally differ from conventional heating in affecting reaction kinetics?
Microwave heating accelerates reactions through efficient internal "in-core" heating. Unlike conventional heating that relies on conductive heat transfer from the vessel walls, microwaves couple directly with molecules in the reaction mixture, leading to rapid, volumetric heating. This direct energy transfer enables instantaneous localized superheating far above the solvent's boiling point, providing the energy to overcome activation barriers more efficiently [85] [65]. While microwaves do not lower the activation energy (Ea), the dramatic increase in temperature significantly enhances the reaction rate constant (k) according to the Arrhenius equation (k = Ae-Ea/RT) [85].
Q2: What are the primary safety mechanisms in modern microwave reactors?
Modern laboratory microwave systems incorporate multiple safety layers:
- Active Safety Measures: These include high-precision temperature and pressure control systems that automatically shut down the reaction if parameters exceed safe limits [86].
- Passive Safety Measures: If active controls fail, passive measures engage. These include pressure vessel safety泄压 mechanisms and 三维定向防爆 (3D directional explosion-proof) designs that channel potential energy release away from the operator [86].
- Containment and Structural Protections: Systems feature reinforced cavities and doors constructed from corrosion-resistant stainless steel designed to contain vessel failures. Interlocking mechanisms prevent operation if the door is unsealed [86] [12].
Q3: Can I use any solvent in microwave-assisted synthesis?
The heating efficiency of a solvent under microwave irradiation is determined by its loss tangent (tan δ), which measures its ability to convert microwave energy into heat [65]. The table below classifies common solvents:
Table 1: Microwave Heating Efficiency of Common Solvents [65]
| Microwave Absorption | Solvent | Tan δ Value |
|---|---|---|
| High (tan δ > 0.5) | Ethylene Glycol | 1.350 |
| Ethanol | 0.941 | |
| DMSO | 0.825 | |
| Medium (tan δ 0.1 - 0.5) | 2-Butanol | 0.447 |
| Water | 0.123 | |
| Chlorobenzene | 0.101 | |
| Low (tan δ < 0.1) | Chloroform | 0.091 |
| Acetone | 0.054 | |
| Toluene | 0.040 | |
| Hexane | 0.020 |
Low tan δ solvents can still be used, especially if reagents or catalysts are polar. For non-polar reaction mixtures, passive heating elements can be added to aid heating [65].
Q4: What materials are strictly prohibited in microwave reactors?
Never microwave the following, as they pose extreme risks of explosion or fire:
- Explosives and Energetic Materials: TNT, nitroglycerin, propellants [86] [12].
- Unstable Chemicals: Compounds with azide or nitro groups can explode under thermal heat [12].
- Flammable Substances: Short-chain alkyls, ethers, ketones, aviation fuel [86].
- Other Prohibited Substances: High氯酸盐, acetylene compounds, binary alcohols (e.g., ethylene glycol), and phenol with nitric acid [86].
Troubleshooting Guides
Issue 1: Unexpected Pressure Increase or Over-Pressure Event
Problem: A rapid and unsafe pressure increase occurs during a microwave-assisted reaction.
Recommended Actions:
- Immediate Cessation: The system should automatically halt irradiation. Do not attempt to manually intervene until the system indicates it is safe.
- Cooling and Venting: Allow the system's built-in cooling mechanism (e.g., simultaneous cooling if equipped) to bring the vessel to room temperature [85]. Only then, carefully vent any remaining pressure in a fume hood.
- Post-Event Analysis:
- Review Reaction Chemistry: Assess if an exothermic runaway reaction occurred. Exothermic reactions can proceed uncontrollably under microwave irradiation due to rapid energy transfer [12].
- Check for Volatile Components: Verify that all reagents and solvents are stable at the target temperature by consulting their Material Safety Data Sheets (MSDS) [12].
- Inspect Vessel Integrity: Examine the vessel and seals for damage, over-pressurization, or chemical degradation [12].
Issue 2: Low Product Yield or Excessive Byproduct Formation
Problem: The desired reaction proceeds slowly, or significant unwanted byproducts are formed compared to conventional heating.
Recommended Actions:
- Optimize Temperature and Time: Start with a lower temperature and shorter time, then gradually increase. Use the Arrhenius principle—a 10°C increase can halve the reaction time [65].
Table 2: Reaction Time Reduction with Increased Temperature [65]
Reaction Temperature 80 °C 90 °C 100 °C 110 °C 120 °C 130 °C 140 °C 150 °C 160 °C Reaction Time 8 h 4 h 2 h 1 h 30 min 15 min 8 min 4 min 2 min - Verify Solvent Suitability: Ensure the solvent's tan δ is appropriate for efficient heating. For sensitive reactions, a medium-absorbing solvent may provide better control than a high-absorbing one [65].
- Consider Kinetic vs. Thermodynamic Control: Microwave energy can provide molecules with sufficient energy to reach higher activation energy barriers, potentially favoring a different reaction pathway (thermodynamic product) than conventional heating (kinetic product) [85]. Review the reaction mechanism to understand which pathway is being promoted.
Issue 3: Arcing or Electrical Discharge Inside Cavity
Problem: Visible sparks or arcing is observed within the microwave cavity.
Recommended Actions:
- Stop Immediately: Arcing can damage the magnetron and cavity.
- Inspect for Conductive Materials: Check for metal residues, foil, ungrounded metal catalysts (e.g., metal filings), or conductive carbon deposits from previous runs [12]. Clean the cavity thoroughly.
- Use Appropriate Catalysts: Small amounts of grounded transition metal catalysts are generally safe and do not cause arcing. Avoid ungrounded metal pieces [12].
The Scientist's Toolkit: Key Research Reagent Solutions
Table 3: Essential Materials for Microwave-Assisted Synthesis
| Item | Function & Importance |
|---|---|
| TFM PFA Vessel Liner | Advanced polymer for inner reaction vessel; offers high chemical and temperature resistance [86]. |
| Fiber Optic Temperature Sensor | Provides precise internal temperature measurement without interfering with the microwave field or risk of sparking, unlike thermocouples [86]. |
| Passive Heating Elements | Materials like silicon carbide used to absorb microwave energy and provide heat for reactions involving low-tan δ (microwave-transparent) solvents [65]. |
| Stir Bar (Heavy Duty) | Ensures efficient mixing within sealed vessels to prevent localized superheating and temperature gradients, which can lead to byproducts or vessel failure [12]. |
| Transition Metal Catalysts | Small, grounded quantities are used to enhance reaction rates (e.g., organometallic reactions) without causing arcing in the microwave field [12]. |
Experimental Workflow & Safety Protocol Diagrams
Diagram 1: Microwave Experiment Safety Workflow
Diagram 2: Microwave vs Conventional Heating Kinetics
Diagram 3: Layered Safety Systems Hierarchy
Technical Support Center
Fundamental Safety Framework
Microwave chemistry offers significant green advantages, including reduced solvent use and shorter reaction times. However, its implementation must be grounded in a strict safety protocol. The core principle is to treat laboratory microwave reactors as specialized equipment, not ordinary kitchen appliances [87].
The table below outlines the essential safety requirements for any microwave-assisted chemistry operation.
| Safety Area | Key Protocols and Rationale |
|---|---|
| Dedicated Use | Must be labeled and used "For Laboratory Use Only." Using the same unit for chemicals and food creates a contamination hazard [87]. |
| Equipment | Use only hardware designed for laboratory synthesis. Domestic microwave ovens lack safety controls, corrode easily, and cannot contain vessel failures [12]. |
| Chemical Safety | Understand reaction kinetics and reagent stability at high temperatures. Avoid functional groups prone to explosion (e.g., azide, nitro) and be cautious with highly exothermic reactions [12]. |
| Personal Protective Equipment (PPE) | Minimum: Sanitized, indirectly vented chemical splash goggles, lab coat, and vinyl or nitrile gloves [87]. |
| Placement & Setup | Located in a well-ventilated area, away from flammables. Must be plugged directly into a GFI-protected wall receptacle (no extension cords) [87]. Operate in a fume hood to avoid inhaling toxic fumes [12]. |
| Training & SOPs | Users must be trained on safe operation. Written Standard Operating Procedures (SOPs) specific to the instructional space are required [87]. |
Frequently Asked Questions (FAQs)
Q1: Are there any "non-thermal" microwave effects that enhance my chemistry? The scientific consensus, backed by extensive research, is that microwaves induce only a thermal effect. The dramatic rate accelerations are primarily due to rapid, uniform heating and the ability to safely achieve superheated temperatures in sealed vessels, not from a direct interaction of radiation with molecules [88] [89] [90]. Any apparent "magical" effects in early studies have largely been attributed to inaccurate temperature measurements or uncontrolled experimental conditions [88].
Q2: Can I use metal catalysts in my microwave reactions? Yes, you can. Small amounts of grounded transition metal catalysts are acceptable and will not typically cause arcing. However, you must avoid metal filings, ungrounded metals, or large metal objects, as they are a potential arc source. Be aware that metallic coatings on vessel walls from reactions can form and lead to localized superheating [12].
Q3: Why should I use a sealed vessel instead of running my reaction under reflux? Open-vessel (reflux) microwave heating provides no significant rate enhancement compared to conventional oil-bath reflux, as the reaction temperature is limited to the solvent's boiling point [89]. The key advantage of microwave chemistry is the ability to safely heat solvents far above their atmospheric boiling points in sealed vessels, which dramatically increases reaction speed according to the Arrhenius equation [89]. For example, a reaction that takes 3 hours at 78°C under reflux can be completed in 10 minutes at 120°C in a sealed vessel [89].
Q4: My microwave reactor has both IR and internal temperature sensors. Which one should I trust? For accurate results, an internal temperature sensor (like a fiber-optic probe) is essential. An externally mounted IR sensor can be falsified in several key situations [89]:
- Exothermic reactions: The IR sensor has a slow response time and cannot detect immediate internal temperature changes.
- Weakly absorbing mixtures: If the reaction mixture doesn't interact well with microwaves, the vessel wall becomes hotter than its contents, causing the IR sensor to report a temperature higher than the actual reaction temperature.
- Heating-while-cooling: If the reactor uses compressed air to cool the vessel, the IR sensor will measure the cooled vessel surface, reporting a temperature significantly lower (up to 60°C) than the actual internal temperature [89].
Troubleshooting Common Experimental Issues
| Problem | Possible Causes & Diagnostic Steps | Solutions & Preventive Measures |
|---|---|---|
| Erratic or Irreproducible Results | • Inaccurate temperature monitoring (relying solely on IR sensor for problematic reactions) [89].• Uncontrolled solvent evaporation in open-vessel kitchen microwave setups [90]. | • Use an internal temperature sensor (fiber-optic) for accurate monitoring [89].• Use only dedicated lab-grade reactors with proper temperature and pressure control [12] [90]. |
| Sparking or Arcing Inside Cavity | • Metal objects present (ungrounded catalysts, foil, metal-containing stir bars) [91] [12].• Damaged waveguide cover [10] [91].• Metallic coating on vessel wall from previous reactions [12]. | • Remove all unauthorized metal objects. Use only certified microwave-safe labware [12].• Inspect and replace the waveguide cover if damaged [10].• Ensure adequate stirring to prevent metallic coatings [12]. |
| Reaction Vessel Failure | • Exceeding pressure/temperature ratings of the vessel [12].• Using vessels beyond their serviceable lifetime [12].• Uncontrolled exothermic reaction overwhelms venting mechanisms [12]. | • Know your reaction kinetics and the stability of solvents/reagents at high temperatures [12].• Regularly inspect vessels for wear and tear.• For new or uncertain reactions, start with small amounts of reagents at a low power level [12]. |
| Low Product Yield at High Temperatures | • Solvent or reagent decomposition at elevated temperatures [12] [90]. | • Consult the Material Safety Data Sheet (MSDS) for information on chemical stability at high temperatures [12].• Optimize temperature and time to minimize decomposition. |
Experimental Protocol: A Representative Green Synthesis
The following workflow and methodology detail a metal-free, oxidative coupling reaction for synthesizing 2-aminobenzoxazoles, exemplifying the green principles of microwave chemistry [92].
Workflow for Microwave-Assisted Synthesis of 2-Aminobenzoxazoles
Detailed Methodology
- Objective: To perform a metal-free oxidative C–H amination of benzoxazoles using a green solvent system and microwave irradiation [92].
- Green Principles Applied: Avoids toxic transition metal catalysts; uses aqueous oxidant; reduces reaction time from hours to minutes.
The Scientist's Toolkit: Key Research Reagent Solutions
| Reagent/Material | Function & Green Attribute |
|---|---|
| Benzoxazole | Core reactant in the oxidative coupling reaction. |
| Amine | Reaction partner for the amination process. |
| Tetrabutylammonium Iodide (TBAI) | Catalyst: A metal-free organocatalyst that facilitates the reaction under mild conditions [92]. |
| tert-Butyl Hydroperoxide (TBHP), Aqueous | Oxidant: An oxidant used in an aqueous solution, reducing the need for hazardous organic solvents [92]. |
| Sealed Microwave Vessel | Reaction Container: Certified vessel that withstands pressure, enabling high-temperature/solvent superheating [89] [12]. |
| Laboratory Microwave Reactor | Equipment: Dedicated instrument with magnetic stirring, temperature/pressure monitoring, and safety containment [12] [90]. |
- Procedure:
- In a certified microwave reaction vessel, combine benzoxazole (1.0 mmol), the amine reactant (1.2 mmol), tetrabutylammonium iodide (TBAI, 20 mol%), and an aqueous solution of tert-butyl hydroperoxide (TBHP, 2.0 equiv) [92].
- Seal the vessel securely and place it into the microwave reactor.
- Program the reactor to heat the mixture to 80°C and hold for a 10-30 minute reaction time.
- After completion, cool the vessel to room temperature according to the manufacturer's instructions before carefully depressurizing and opening it.
- Purify the crude product using standard techniques like extraction or chromatography.
- Expected Outcome: This method provides a high yield of the 2-aminobenzoxazole product (reported yields of 82-97%) in a significantly shorter time compared to conventional metal-catalyzed methods [92].
Process Analytical Technology (PAT) is a system for analyzing, optimizing, and controlling manufacturing processes by measuring Critical Process Parameters (CPPs) and Critical Quality Attributes (CQAs) [93]. In the context of microwave-assisted chemical reactions, PAT provides the framework for implementing automated controls that enable real-time process monitoring and adjustment. This approach facilitates consistent reproduction of reaction conditions, ensuring that results are reliable, scalable, and safe [93] [94]. Automated PAT systems replace manual sampling with industrial process analyzers that operate continuously, providing immediate data feedback to control systems without time delays [93].
Troubleshooting Guides
Common PAT Integration Issues in Microwave Reactors
Table 1: Troubleshooting Common PAT Integration Challenges
| Problem | Possible Cause | Solution | Prevention |
|---|---|---|---|
| Erratic sensor readings | Probe placement interferes with microwave field; improper shielding | Reposition probe to a validated location; verify RFI/EMI shielding on all sensor wiring | Conduct empty-chamber field mapping prior to experiments; use only certified PAT probes rated for microwave environments [95] |
| Poor reproducibility between runs | Unmonitored power fluctuations; inadequate vessel venting control | Implement real-time power monitoring via PAT; automate pressure and temperature interlocks | Establish and validate a design space for CPPs; use automated feedback controls for all critical parameters [94] |
| Safety system failures | Inadequate pressure monitoring; delayed hazard detection | Install multiple redundant pressure sensors with automated shutdown protocols | Implement PAT with real-time spectral monitoring to detect unexpected exotherms or by-products before they reach critical levels [95] |
| Data integrity issues | Electromagnetic interference on signal lines; insufficient data sampling frequency | Install ferrite beads on all data cables; increase data acquisition rate to capture rapid reaction events | Use fiber-optic connections where possible; validate data acquisition system for microwave environment during method development [96] |
Microwave-Specific Safety Concerns
Table 2: Addressing Microwave-Specific Safety Challenges
| Safety Issue | Risk Factor | PAT-Enabled Control Strategy |
|---|---|---|
| Pressure buildup in sealed vessels | Explosion potential with volatile solvents | Real-time pressure monitoring with automated power modulation and venting systems [95] |
| Thermal runaway reactions | Uncontrolled exothermic processes | In-line temperature monitoring with infrared sensors and automated power shutdown triggers |
| Flammable solvent hazards | Ignition risk from arcing or overheating | Use of explosion-proof microwave systems; in-line concentration monitoring to maintain safe solvent levels [95] |
| Material compatibility issues | Vessel degradation or catalytic effects | Real-time monitoring for reaction by-products that indicate vessel failure; automated material tracking |
Frequently Asked Questions (FAQs)
Q1: How can PAT improve reproducibility in microwave chemical synthesis? PAT enables real-time monitoring of CPPs such as temperature, pressure, and reaction progression through spectroscopic methods (e.g., Raman, NIR). This allows for automatic adjustment of microwave power and other parameters to maintain conditions within the validated design space, ensuring consistent results across multiple batches [94] [96].
Q2: What are the essential safety protocols for microwave use with chemical reactions? Microwaves in laboratory settings must be dedicated solely to laboratory use—never for food—and clearly labeled "For Laboratory Use Only" [95]. Additional critical protocols include:
- Regular inspection of door seals and hinges before each use
- Using only microwave-safe glassware without metal components
- Ensuring adequate venting of reaction vessels to prevent pressure buildup
- Maintaining a Class ABC fire extinguisher nearby
- Implementing standard operating procedures (SOPs) and comprehensive user training [95]
Q3: Which PAT tools are most suitable for monitoring microwave reactions? Near-infrared (NIR) and Raman spectroscopy are particularly valuable for microwave applications as they provide rapid results (within seconds) without chemical consumption [93]. These techniques can monitor chemical composition, reaction endpoints, and physical parameters in situ, making them ideal for real-time control of microwave-assisted synthesis [97] [94].
Q4: How does PAT support regulatory compliance in pharmaceutical development? PAT is recognized by regulatory agencies including the FDA as a framework for implementing Quality by Design (QbD) principles [94]. By providing continuous quality verification throughout the manufacturing process—rather than relying solely on end-product testing—PAT facilitates Real-Time Release Testing (RTRT) and creates comprehensive data trails for regulatory submissions [94] [96].
Q5: What are the implementation challenges for PAT in microwave environments? Key challenges include electromagnetic interference with analytical instrumentation, the need for specialized fiber-optic probes compatible with microwave fields, and the development of robust chemometric models that can withstand the rapid heating and cooling cycles characteristic of microwave chemistry [96]. These can be mitigated through proper shielding, probe selection, and method validation.
Experimental Protocols & Workflows
Standard Operating Procedure: PAT-Enabled Microwave Esterification Reaction
Objective: Reproducible synthesis of benzyl acetate with real-time monitoring and automated safety controls.
Materials and Equipment:
- Microwave reactor with fiber-optic temperature and pressure sensors
- ATR-FTIR or Raman spectrometer with microwave-compatible probe
- Computer-controlled syringe pump for reagent addition
- Data acquisition system with real-time monitoring capability
Procedure:
- System Calibration: Calibrate spectroscopic sensors using standard solutions of starting materials and product. Validate temperature sensors against reference thermometer.
Reactor Setup: Charge reaction vessel with benzoic acid (1.0 eq) and catalytic sulfuric acid. Position spectroscopic probe to monitor reaction mixture without interfering with microwave field.
Parameter Programming: Set initial microwave power to 100W with temperature ramp to 80°C. Program safety limits: maximum temperature 100°C, maximum pressure 3 bar.
Reaction Initiation: Start microwave irradiation and begin addition of benzyl alcohol (1.2 eq) via automated syringe pump over 5 minutes.
Real-Time Monitoring: Monitor reaction progress via characteristic spectral markers (disappearance of acid C=O peak at 1690 cm⁻¹, appearance of ester C=O peak at 1735 cm⁻¹).
Automated Endpoint Detection: Program system to automatically reduce power to 10W when reaction completion criteria are met (≥95% conversion by spectral analysis).
System Shutdown: Implement automated cooldown cycle with continuous monitoring until temperature <40°C and pressure <1 bar.
Data Documentation: Export all process data including temperature/pressure profiles, spectral evolution, and power modulation records for validation documentation.
PAT Implementation Workflow
The Scientist's Toolkit: Essential Research Reagent Solutions
Table 3: Key Research Reagents and Materials for PAT-Enabled Microwave Chemistry
| Reagent/Material | Function | PAT Monitoring Considerations |
|---|---|---|
| Silicon carbide (SiC) heating elements | Provides uniform heating for reactions with poor microwave absorption | Monitor actual reaction temperature vs. vessel temperature using internal probes [95] |
| Deuterated solvents | Enables in-situ NMR monitoring of reaction progression | Requires specialized NMR-compatible microwave vessels and shielding |
| Chemical dosimeters | References for validating microwave field distribution and calorimetry | Use for initial system qualification and periodic requalification |
| Fiber-optic temperature probes | Accurate temperature measurement unaffected by microwave fields | Essential for real-time reaction control; requires validation against standard references |
| Spectroscopic reference standards | Calibration of PAT sensors for quantitative analysis | Establish calibration models across expected concentration ranges before reaction execution |
Advanced PAT Implementation Framework
This technical support framework demonstrates how Process Analytical Technology, when integrated with automated controls, provides a robust foundation for reproducible and safe microwave-assisted chemical synthesis. The troubleshooting guides, FAQs, and experimental protocols address common implementation challenges while emphasizing the critical safety protocols required for successful adoption of these advanced technologies.
Conclusion
Adherence to rigorous safety protocols is not a barrier to innovation but a fundamental enabler for the successful and sustainable application of microwave technology in chemical research and drug development. By integrating foundational knowledge of hazards, methodological rigor in equipment and procedure, proactive troubleshooting, and validation through comparative analysis, laboratories can fully leverage the profound benefits of microwave-assisted reactions—including dramatic reductions in reaction time, improved yields, and superior energy efficiency—while maintaining the highest safety standards. The future of biomedical research will be increasingly shaped by these efficient, green chemistry principles, with microwave synthesis playing a pivotal role in accelerating the discovery and development of new therapeutics. Future directions will involve greater integration with Industry 4.0, machine learning for predictive safety, and continued development of inherently safer reactor designs.
References
- 1. Microwave digestion instrument pressure relief warning - welso [https://www.welsomed.com/blog/show-242.html]
- 2. Observer-based monitoring of thermal runaway in ... [https://www.sciencedirect.com/science/article/abs/pii/S0959152406000564]
- 3. Investigating the microwave heating behaviour of lunar soil ... [https://www.nature.com/articles/s41598-021-81691-w]
- 4. Is a Microwave Safe?: 2025 Comprehensive Guide [https://www.searshomeservices.com/blog/is-a-microwave-safe-comprehensive-guide]
- 5. Non-Ionizing Radiation Used in Microwave Ovens [https://www.epa.gov/radtown/non-ionizing-radiation-used-microwave-ovens]
- 6. Microwave Radiation and the Brain: Mechanisms, Current ... [https://pmc.ncbi.nlm.nih.gov/articles/PMC9409438/]
- 7. Safe working with solvents in microwaves [https://www.berghof-instruments.com/en/theory-of-digestion/overview-of-digestion-techniques/solid-liquid-extraction/safe-working-with-solvents-in-microwaves/]
- 8. Notes on the Troubleshooting and Repair of Microwave ... [https://www.repairfaq.org/sam/micfaq.htm]
- 9. Safety Protocols for Microwave Use in Science/STEM ... [https://www.nsta.org/blog/safety-protocols-microwave-use-sciencestem-instructional-spaces?srsltid=AfmBOor9RjpgpT8fI70jlaUf9pvfQ7Y63T_RFUsu2KsPfhirBct0UWzJ]
- 10. Microwave Maintenance, Repair Guide [https://www.tvmountcharlotte.com/microwave-maintenance-and-repair-guide/]
- 11. The use of microwave ovens with flammable liquids [https://www.sciencedirect.com/science/article/abs/pii/S1074909805000341]
- 12. Safety Considerations for Microwave Synthesis [https://cem.com/microwave-chemistry/safety]
- 13. Microwave Fire Safety: Prevention, Response & Recovery ... [https://www.firecashbuyer.com/resources/microwave-fire]
- 14. How to avoid erroneous conclusions in microwave synthesis [https://wiki.anton-paar.com/en/how-to-avoid-erroneous-conclusions-in-microwave-synthesis/]
- 15. Safety Protocols for Microwave Use in Science/STEM ... [https://www.nsta.org/blog/safety-protocols-microwave-use-sciencestem-instructional-spaces?srsltid=AfmBOorjp0f-M8GBswCwL1pVcTUKhOjObvat32yuvSGeF9BdcFR2I8Pc]
- 16. Safety Protocols for Microwave Use in Science/STEM ... [https://www.nsta.org/blog/safety-protocols-microwave-use-sciencestem-instructional-spaces?srsltid=AfmBOorBuqT8d4mlUoHMJR_mn7ceBQW58PwXyzcyD4rT37Oi2gao6RIF]
- 17. Requirements for Shared Lab Spaces [https://ehs.unc.edu/topics/laboratory-upkeep/requirements-for-shared-lab-spaces/]
- 18. Chapter 6 - Safety Precautions On The Application of ... [https://es.scribd.com/document/77720605/Chapter-6-Safety-precautions-on-the-application-of-microwaves-in-laboratory]
- 19. Biosafety Levels & Lab Safety Guidelines [https://aspr.hhs.gov/S3/Pages/Biosafety-Level-Requirements.aspx]
- 20. Safety Protocols for Microwave Use in Science/STEM ... [https://www.nsta.org/blog/safety-protocols-microwave-use-sciencestem-instructional-spaces?srsltid=AfmBOopvMuvjl1r4n7-hTgGm-NpxfxMQy1WPTnRRZAUf0fwlq3sH3cGC]
- 21. Occupational Safety and Health Administration [http://www.osha.gov/laws-regs/standardinterpretations/2002-08-08-0]
- 22. OSHA Compliance Checklist - Updated for 2025 [https://www.hipaajournal.com/osha-compliance-checklist/]
- 23. Laboratory Safety and Chemical Hygiene Plan [https://researchsafety.northwestern.edu/safety-information/laboratory-safety-and-chemical-hygiene-plan.html]
- 24. Microwave Ovens [https://www.fda.gov/radiation-emitting-products/resources-you-radiation-emitting-products/microwave-ovens]
- 25. Safety Protocols for Microwave Use in Science/STEM ... [https://www.nsta.org/blog/safety-protocols-microwave-use-sciencestem-instructional-spaces?srsltid=AfmBOoqbBh6hnXAR1TrHe21fxvx0_F1wx0vexiiJ4WqARiKnOhtVhSuK]
- 26. Microwave Oven Safety Guidelines - UC Berkeley [https://ehs.berkeley.edu/non-ionizing-radiation-non-laser-manual/microwave-oven-safety-guidelines]
- 27. Microwave Safety [https://www.k-state.edu/safety/programs/lab/labsafety/topics/microwaveSafety.html]
- 28. Getting Started with Microwave Synthesis [https://cem.com/microwave-chemistry/getting-started]
- 29. Microwave Safety [https://www.labmanager.com/microwave-safety-6725]
- 30. BP-090 Laboratory Grade Microwave [https://labstore.com/product/bp-090-laboratory-grade-microwave/]
- 31. BP-090 Laboratory Grade Microwave [https://www.microwaveresearch.com/BP-090.php]
- 32. What to Know About Microwave Ovens and Your Health [https://www.webmd.com/food-recipes/what-to-microwave-ovens-health]
- 33. Safety Protocols for Microwave Use in Science/STEM ... [https://www.nsta.org/blog/safety-protocols-microwave-use-sciencestem-instructional-spaces?srsltid=AfmBOopGMiZo22OMNUY56q9WsVE-2_h5taJWMxCi8uZdsfKw19Nvue8C]
- 34. Laboratory Microwave Ovens and Hot Plates [https://www.uvm.edu/safety/laboratory-microwave-ovens-and-hot-plates]
- 35. Microwave Not Heating: Possible Causes and Fixes [https://www.whirlpool.com/blog/kitchen/microwave-not-heating.html]
- 36. Safety Protocols for Microwave Use in Science/STEM ... [https://www.nsta.org/blog/safety-protocols-microwave-use-sciencestem-instructional-spaces?srsltid=AfmBOorBKZtI-jmcJwoxO2vhRYu6QK9k5l59e4pgYr5ue5WPpLjnCDN6]
- 37. Microwave-Assisted Organic Synthesis: A Green Chemistry ... [https://www.ijrpas.com/HTMLPaper.aspx?Journal=International%20Journal%20of%20Research%20in%20Pharmacy%20and%20Allied%20Science;PID=2025-4-6-5]
- 38. Chemical Splash Lab Science Safety Goggles [https://www.flinnsci.com/products/safety-supplies/personal-protective-equipment/chemical-splash-goggles/?srsltid=AfmBOooFnbv4yezbqe7zQHmNlCrIYAtgYNcHL-HGl_d-9hOMRIz22j0O]
- 39. PPE Maintenance - USC Environmental Health & Safety [https://ehs.usc.edu/research/lab/manage/ppe2/ppe-maintenance/]
- 40. Personal Protective Equipment Requirements for Laboratories [https://ehs.ncsu.edu/laboratory-safety/personal-protective-equipment-requirements-for-laboratories/]
- 41. Assessment of Protective Gloves for Use with Airfed Suits [https://pubmed.ncbi.nlm.nih.gov/26272645/]
- 42. Development of an Experimental Technique to Determine ... [https://stacks.cdc.gov/view/cdc/215730]
- 43. Selecting the Right Lab Coat [https://www.nsta.org/blog/selecting-right-lab-coat?srsltid=AfmBOopzqI-TzX5CvM0Afhki2fSMijDSZSfDUNpiyohBZtT56EOnAiCT]
- 44. Safety Protocols for Microwave Use in Science/STEM ... [https://www.nsta.org/blog/safety-protocols-microwave-use-sciencestem-instructional-spaces?srsltid=AfmBOooaoBhnORLtAtmY-79EGXST4ktfSeWZWb7ylAxFDg0youclS3PS]
- 45. Safety Protocols for Microwave Use in Science/STEM ... [https://www.nsta.org/blog/safety-protocols-microwave-use-sciencestem-instructional-spaces?srsltid=AfmBOoqBLFwokEdk4VDcZfFlqwWuVg1MbspjCZ4B7NKumitBXPxvaE5q]
- 46. 微波合成仪使用注意事项及操作指南 [https://www.sineo.cn/show/715.html]
- 47. Microwave-Assisted Organic Synthesis: An Eco-Friendly ... [https://www.mdpi.com/1424-8247/18/11/1692]
- 48. Microwave Digestion [https://www.milestonesrl.com/greenbooks/126-blog2022/microwave-digestion/index.php]
- 49. Common Microwave Problems and How to Troubleshoot ... [https://royalelectronicsgroup.com/2025/08/28/common-microwave-problems-and-how-to-troubleshoot-them-at-home/]
- 50. Safety Protocols for Microwave Use in Science/STEM ... [https://www.nsta.org/blog/safety-protocols-microwave-use-sciencestem-instructional-spaces?srsltid=AfmBOoofokKnq7SUuj9cOKatByZBTBCZXrWLCcimlChKAzzUgu85yZqS]
- 51. Safety Cans and Containers [https://www.justrite.com/safety-cans-containers?srsltid=AfmBOoqsxaQWCANETRInhEFmsK-DSg2juce0YRyidF8h3tUE2UKXRgSa]
- 52. Understanding the Types of Solvents and How to Handle ... [https://www.ansell.com/jp/en/blogs/safety-briefing/emap/understanding-the-types-of-solvents-and-how-to-handle-them-safely?SwitchToLanguage=en&switchToRegion=gb]
- 53. Flammable Liquids - - Division of Research Safety | Illinois [https://drs.illinois.edu/Page/SafetyLibrary/FlammableLiquids]
- 54. Storage Safety Cabinets for Hazardous Chemicals [https://www.ccohs.ca/oshanswers/prevention/safety_cabinets.html]
- 55. Safety Protocols for Microwave Use in Science/STEM ... [https://www.nsta.org/blog/safety-protocols-microwave-use-sciencestem-instructional-spaces?srsltid=AfmBOooIglkMwI190vJm_loS3aHJ0d9zmXYPhGT_9POhkPXv2FN3bAem]
- 56. Troubleshooting Guide [https://www.thermatru.com/project-center/troubleshooting-guide/]
- 57. 9 Common Door Problems & How to Fix Them [https://www.manhattandoor.com/blog/door-problems-how-to-fix-them/]
- 58. Safety Protocols for Microwave Use in Science/STEM ... [https://www.nsta.org/blog/safety-protocols-microwave-use-sciencestem-instructional-spaces?srsltid=AfmBOorLeL4NVCBkfbW26MBSQ1Ktjn2cBm4oBH181JC82ZxotgPUvXii]
- 59. Microwave Vessel Cleaning Guide | PDF | Purified Water [https://www.scribd.com/document/457592968/Vessel-cleaning-decontamination-SK-MAXI-Rev-1]
- 60. Understanding microwave vessel contamination by ... [https://pubmed.ncbi.nlm.nih.gov/27474275/]
- 61. What's the best approach to clean my digestion vessels? [https://www.milestonesrl.com/corporate/blog/clean-chemistry-tools-for-atomic-spectroscopy/1015-reducing-sample-prep-contamination-by-an-effective-cleaning-of-items-used-in-ultra-trace-analysis]
- 62. Safety Considerations for Microwave Synthesis [https://cem.com/cn/microwave-chemistry/safety]
- 63. Understanding Chemical Reaction Hazards in Manufacturing [https://sigma-hse.us/blog/chemical-reaction-hazards-processes/]
- 64. Fact Sheet: Heating Reactions | PennEHRS - UPenn EHRS [https://ehrs.upenn.edu/health-safety/lab-safety/chemical-hygiene-plan/fact-sheets/fact-sheet-heating-reactions]
- 65. Microwave-assisted synthesis | Anton Paar Wiki [https://wiki.anton-paar.com/en/microwave-assisted-synthesis/]
- 66. Safety Protocols for Microwave Use in Science/STEM ... [https://www.nsta.org/blog/safety-protocols-microwave-use-sciencestem-instructional-spaces?srsltid=AfmBOoo4NHQ0EyBSAQR7KnPYveGA4oL8TD_TUn4ppKxaIa2CiRozRvVb]
- 67. Microwave-assisted synthesis of nanomaterials: a green ... [https://pubs.rsc.org/en/content/articlehtml/2025/su/d5su00584a]
- 68. Safety Protocols for Microwave Use in Science/STEM ... [https://www.nsta.org/blog/safety-protocols-microwave-use-sciencestem-instructional-spaces?srsltid=AfmBOopOEj_PHhUyqMwvcipYH4L7aZ63VFt2u3FgOHl36wT8DGhTtZuL]
- 69. Highly parallel optimisation of chemical reactions through ... [https://www.nature.com/articles/s41467-025-61803-0]
- 70. Effect of Microwave Heating on the Acrylamide Formation ... [https://pmc.ncbi.nlm.nih.gov/articles/PMC7570677/]
- 71. Optimization of reaction parameters by response surface ... [https://www.sciencedirect.com/science/article/abs/pii/S0360319925033762]
- 72. Optimizing Chemical Reactions: A Guide to Refining Key ... [https://wnynewsnow.com/2025/08/02/optimizing-chemical-reactions-a-guide-to-refining-key-parameters/]
- 73. Safety Protocols for Microwave Use in Science/STEM ... [https://www.nsta.org/blog/safety-protocols-microwave-use-sciencestem-instructional-spaces?srsltid=AfmBOorUbsPab9M6zvTV80xM0aKCkV92WzyJWiEi2oNS5DLQvhdCMoO7]
- 74. Laboratory Equipment Repair & Preventive Maintenance Tips [https://rdlaboratoryequipment.com/blogs/all/maintenance-repair-of-laboratory-equipment?srsltid=AfmBOopzeolcZ0Mh871BMR5pUqQo7DYvIGU6AmJmxsODyX9lxiNg7kZ0]
- 75. Laboratory Emergency Equipment [https://ehs.stonybrook.edu/programs/_archive_july_2025/laboratory-emergency-equipment]
- 76. Chemical Spill Kits Market Report | Global Forecast From ... [https://dataintelo.com/report/global-chemical-spill-kits-market]
- 77. 磁力搅拌器常见故障及解决方法 [http://www.shxihao.net/Article-2609996.html]
- 78. 实验室反应釜故障原因及排除方法 - 仪器仪表技术资料 [https://tech.hi1718.com/solution/82529.html]
- 79. Discover - 微波合成器 [https://cem.com/cn/discover]
- 80. 微波合成常見問題釋疑 - 科安知識庫 [https://blog.kohan.com.tw/%E5%8C%96%E5%AD%B8%E5%90%88%E6%88%90-%E7%94%9F%E7%89%A9%E7%A7%91%E6%8A%80/%E5%BE%AE%E6%B3%A2%E5%90%88%E6%88%90%E5%B8%B8%E8%A6%8B%E5%95%8F%E9%A1%8C%E9%87%8B%E7%96%91/]
- 81. Safety Considerations for Microwave Synthesis [https://cem.com/pt/microwave-chemistry/safety]
- 82. 遇到微波合成仪的常见故障要如何解决 [http://www.toppreekem.com/Article-4152470.html]
- 83. Safety Protocols for Microwave Use in Science/STEM ... [https://www.nsta.org/blog/safety-protocols-microwave-use-sciencestem-instructional-spaces?srsltid=AfmBOoqnLK0_G4wzin8f9nm9XxLJYqMBzaWWj5BkDgy0u3GPlhniQMWE]
- 84. 快速認識微波化學─為什麼微波廣泛應用在合成及各類化學 ... [https://www.rightek.com.tw/blog/%E5%BF%AB%E9%80%9F%E8%AA%8D%E8%AD%98%E5%BE%AE%E6%B3%A2%E5%8C%96%E5%AD%B8%E2%94%80%E7%82%BA%E4%BB%80%E9%BA%BC%E5%BE%AE%E6%B3%A2%E5%BB%A3%E6%B3%9B%E6%87%89%E7%94%A8%E5%9C%A8%E5%90%88%E6%88%90%E5%8F%8A-2/]
- 85. Theory of Microwave Heating for Organic Synthesis [http://cem.com/in/microwave-chemistry/theory]
- 86. 微波消解过程常见问题解疑 [https://m.instrument.com.cn/bbs/d-8455820-1.html]
- 87. Safety Protocols for Microwave Use in Science/STEM ... [https://www.nsta.org/blog/safety-protocols-microwave-use-sciencestem-instructional-spaces?srsltid=AfmBOop_2TzqQM8ST5oLD-ADRBWEpE1NhEfnpcIGkuW0sVYR-VeI6DxO]
- 88. Microwave Chemistry Remains Hot, Fast, And A Tad Mystical [https://cen.acs.org/articles/92/i4/Microwave-Chemistry-Remains-Hot-Fast.html]
- 89. How to avoid erroneous conclusions in microwave synthesis [https://wiki.anton-paar.com/us-en/how-to-avoid-erroneous-conclusions-in-microwave-synthesis/]
- 90. My Twenty Years in Microwave Chemistry: From Kitchen ... [https://pmc.ncbi.nlm.nih.gov/articles/PMC6391988/]
- 91. Microwave Malfunctions: Troubleshooting Common ... [https://www.allvalleyappliancerepair.com/microwave-malfunctions-troubleshooting-common-problems/]
- 92. Frontiers | Revolutionizing organic synthesis through green ... chemistry [https://www.frontiersin.org/journals/chemistry/articles/10.3389/fchem.2025.1656935/full]
- 93. To automate or not to automate? Advantages of PAT – Part 1 [https://www.metrohm.com/en/discover/blog/20-21/to-automate-or-not-to-automate--advantages-of-pat---part-1.html]
- 94. Process Analytical Technology Tools for Monitoring ... [https://pmc.ncbi.nlm.nih.gov/articles/PMC8234957/]
- 95. Safety Protocols for Microwave Use in Science/STEM ... [https://www.nsta.org/blog/safety-protocols-microwave-use-sciencestem-instructional-spaces?srsltid=AfmBOop__nab73X6a1UT6RFdEKO3SyQIe05Kt3y2bKOdhmbgUhK4kzhi]
- 96. Process Analytical Technologies – Advances in bioprocess ... [https://www.sciencedirect.com/science/article/pii/S0731708521004908]
- 97. Process Analytical Technology: A Clear Guide to PAT and ... [https://www.innopharmaeducation.com/blog/process-analytical-technology-a-clear-guide-to-pat-and-how-to-get-started-in-the-industry]